


With the aBlocks Mailchimp integration, you can easily connect your WordPress site to Mailchimp and start collecting subscribers right from your custom forms. Build stylish, responsive signup forms with aBlocks and have new contacts automatically added to your Mailchimp audience.
This integration helps you:
- Sync subscribers directly to Mailchimp lists
- Automate campaigns as soon as users sign up
In this guide, you’ll learn how to set up and use the Mailchimp integration in aBlocks step by step.
Getting Your Mailchimp API Key
To connect aBlocks with Mailchimp, you’ll need to generate and add your Mailchimp API Key. This key allows your WordPress site to securely communicate with your Mailchimp account.
Follow these steps:
1. Log in to Your Mailchimp Account
- Open mailchimp.com in your browser.
- Click Log In in the top-right corner.
- Enter your username and password, then click Log In.
- (If you have two-factor authentication enabled, complete that step as well.)
2. Go to Account Settings
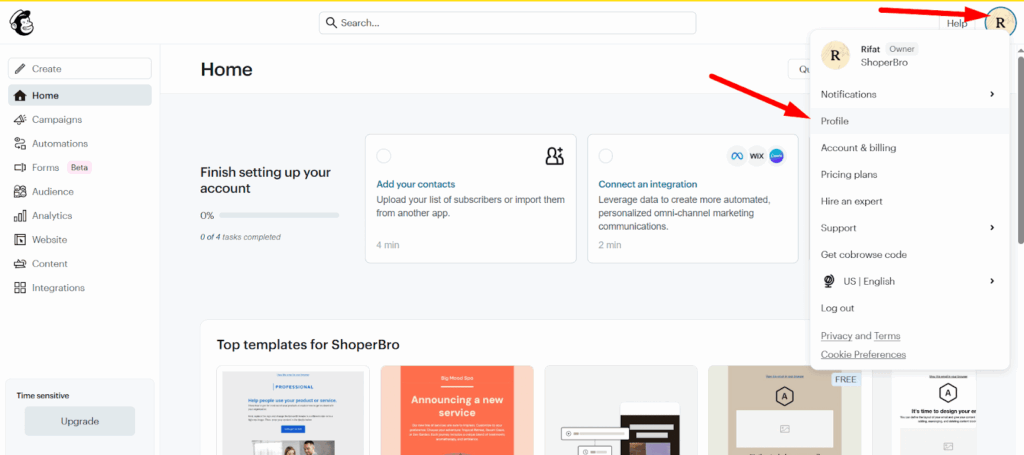
- Once logged in, look at the right corner of your dashboard.
- Click on your profile avatar (circle with your account name/initials).
- Next, click on profile.
3. Open the API Keys Section
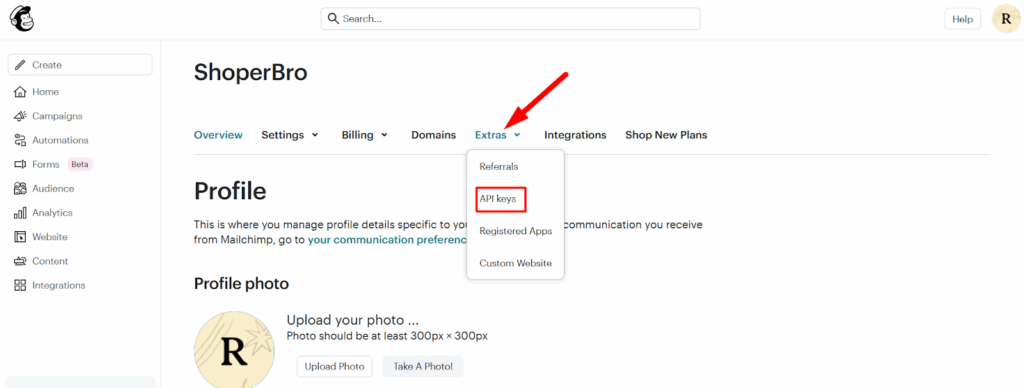
- In the Account page, go to the top navigation bar.
- Click on Extras.
- From the dropdown menu, select API keys.
4. Create a New API Key
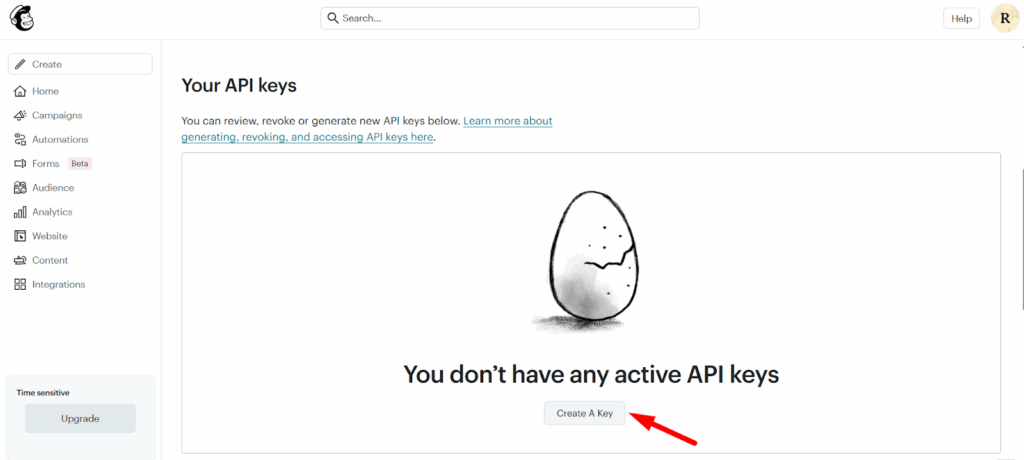
- Scroll down to the API keys section.
- Click the Create A Key button.
- Mailchimp will instantly generate a new key.
- You’ll see the key appear in the list of API keys, along with a Label and Status.
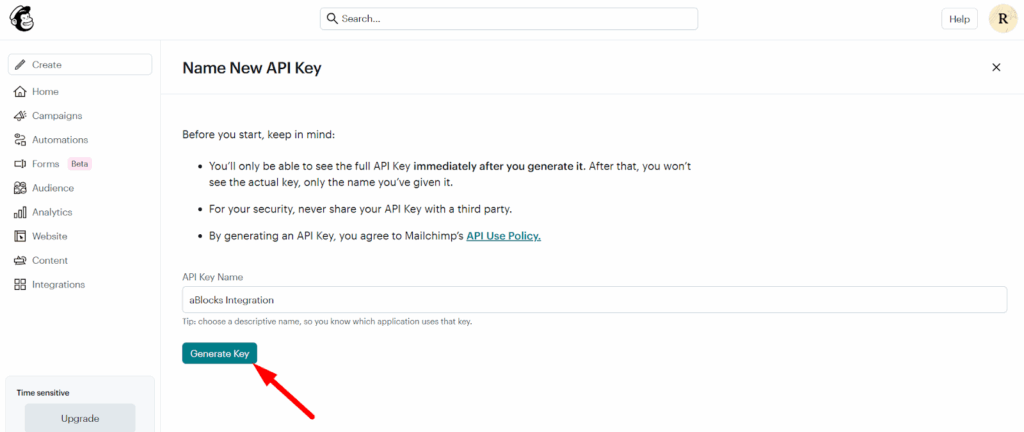
Tip: Use the Label field to name your API key (e.g., “aBlocks Integration”) so you can easily identify it later.
5. Copy and Secure Your API Key
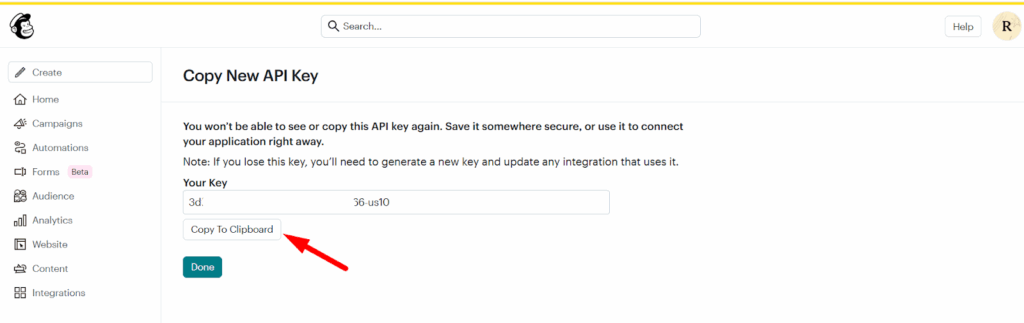
- Click inside the API Key field to highlight it, then copy it.
- Keep this key safe—it acts like a password.
- Never share it publicly or include it in screenshots/tutorials.
6. Add the API Key to aBlocks
After generating your API key, log in to your WordPress dashboard and navigate to aBlocks → Settings. From there, open the Integrations tab, where you’ll find the Mailchimp Integration section.
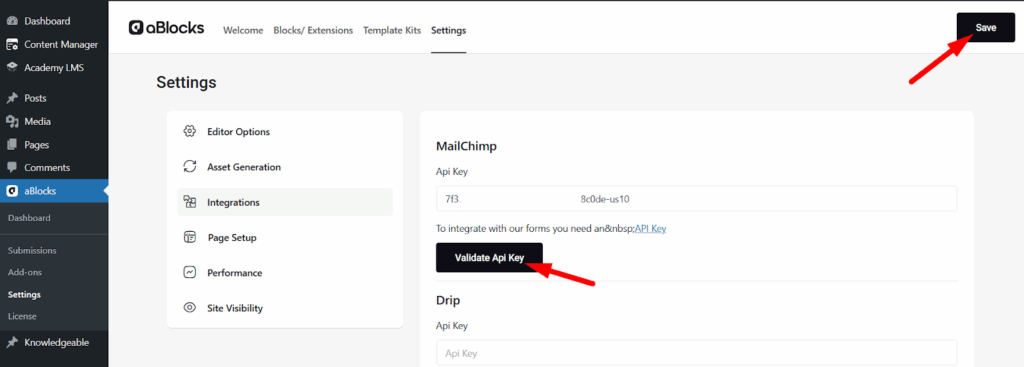
Paste the API key you copied from Mailchimp into the designated field, then click Save Changes. This will store your key securely and allow aBlocks to communicate with your Mailchimp account.
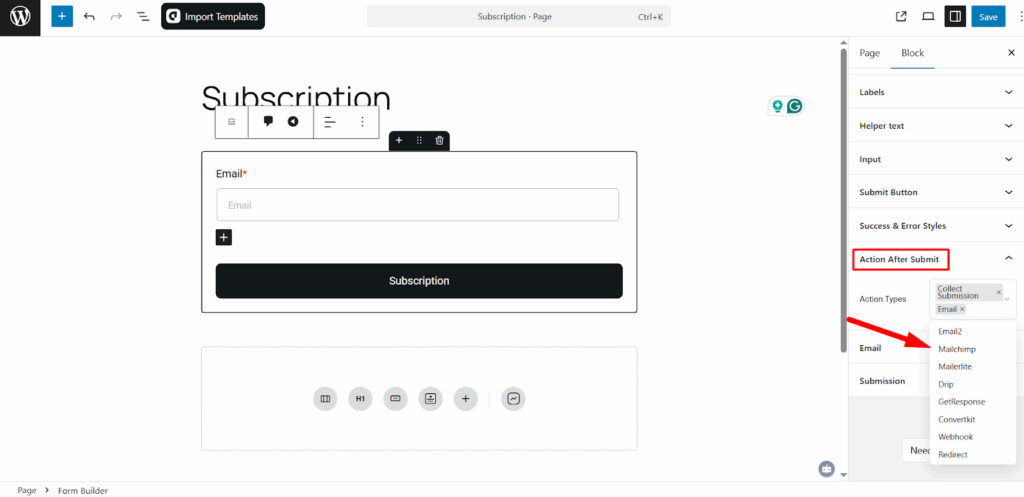
7. Connect Your Form with Mailchimp
Now that your API key is saved, the next step is to integrate your form with Mailchimp. To do this, open any subscription form you’ve created with aBlocks. In the form’s parent settings, locate the Action After Submit option. From the dropdown, select Mailchimp and save your changes.
When you select MailChimp from the action after submit, a MailChimp menu will appear. From there, now select the audience list you want to use.
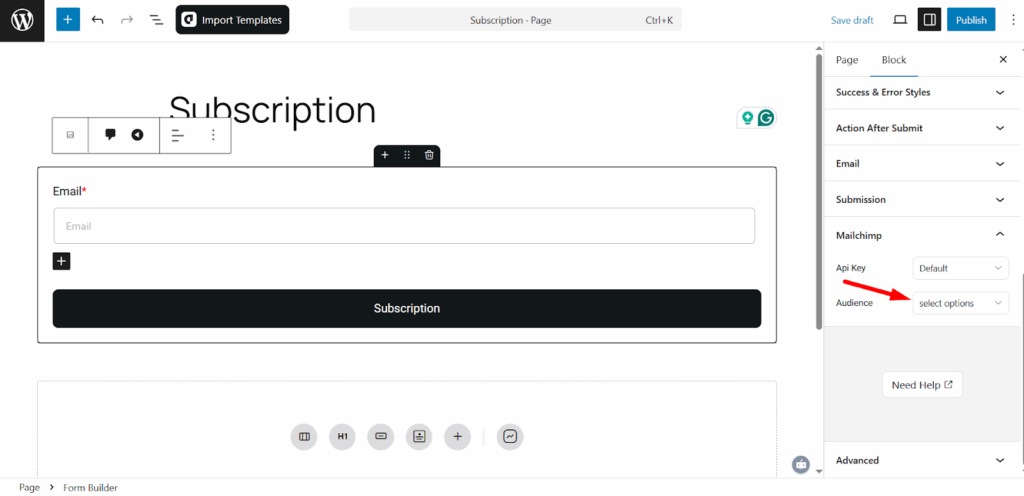
Once this is set, anyone who subscribes through that form will automatically be added to your chosen Mailchimp list.