


The Map Block from aBlocks lets you add an interactive map to your WordPress page using the default Gutenberg editor. It’s perfect for displaying store locations, offices, event spots, or any physical address.
Add the aBlocks Map Block
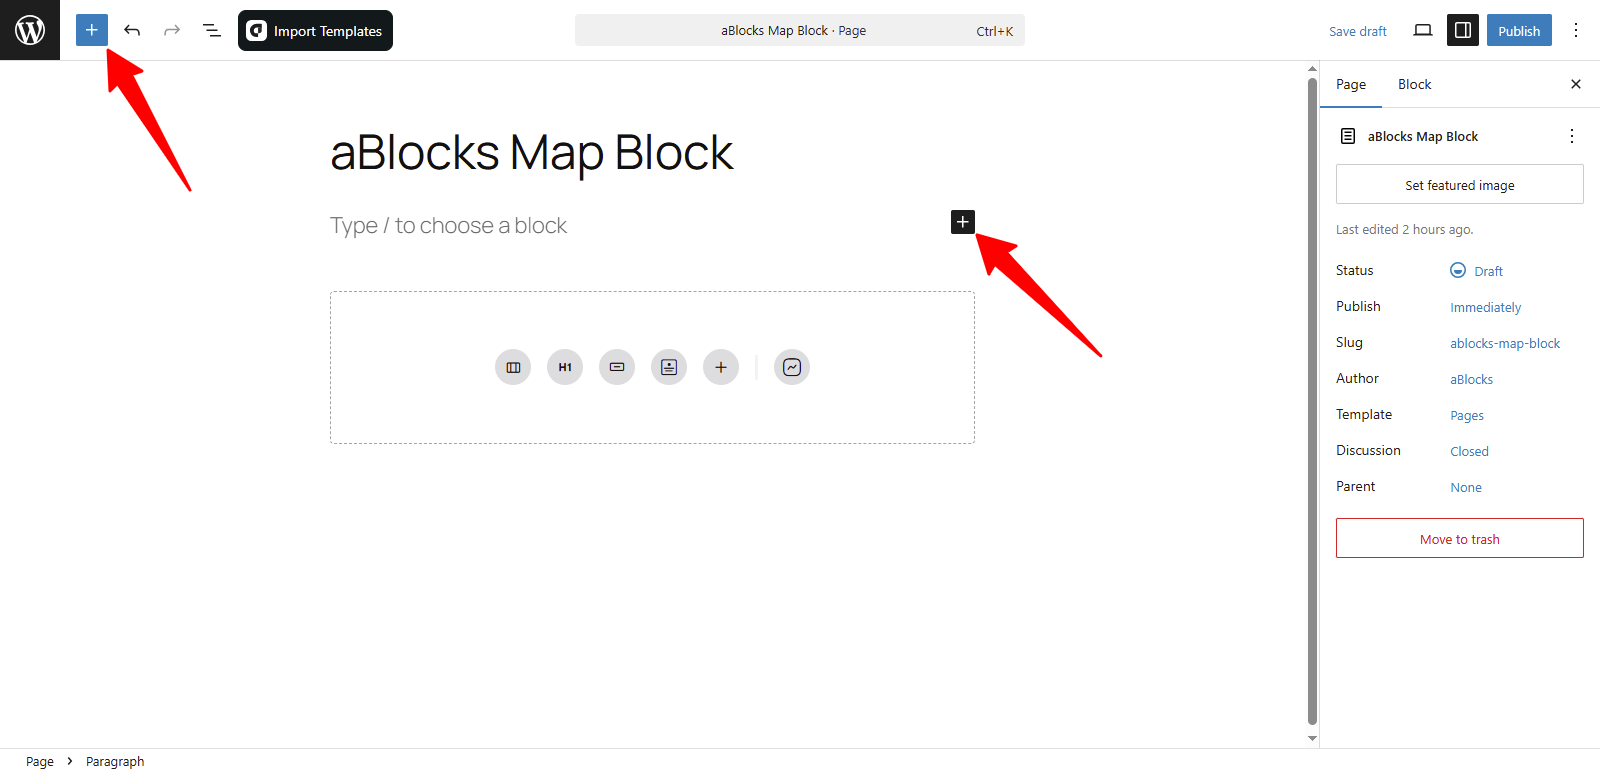
Open your WordPress dashboard and go to the page or post where you want to add the map.
Click the ( + ) icon to open the block options.
You’ll see all the available aBlocks blocks. You can scroll to find the Map Block or type Map Block in the search bar to locate it quickly.
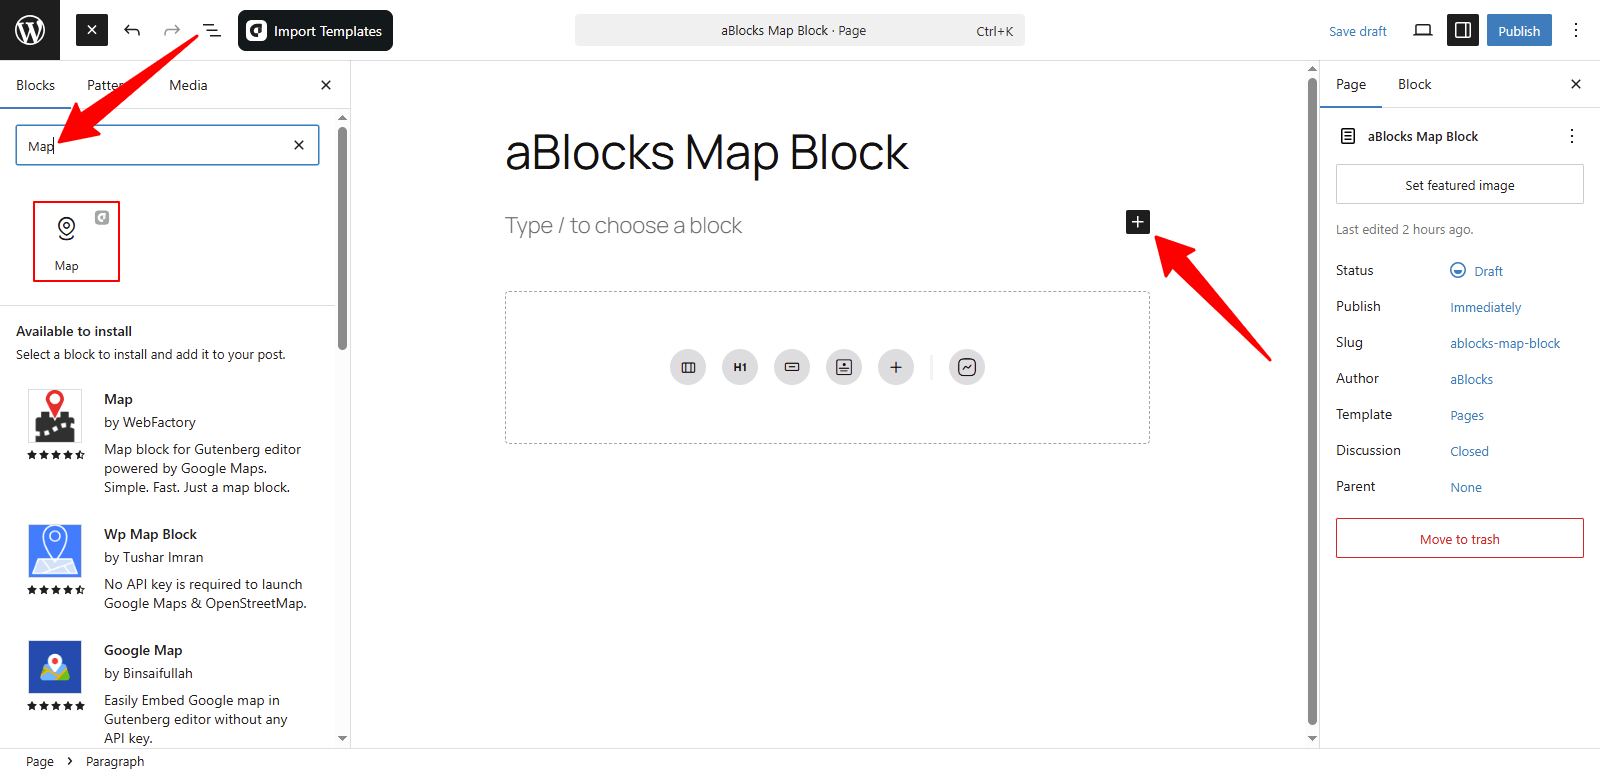
Now, select the aBlocks Map Block and click to add it. After that, customize the block by entering your desired location in the settings panel.
Customize the aBlocks Map Block
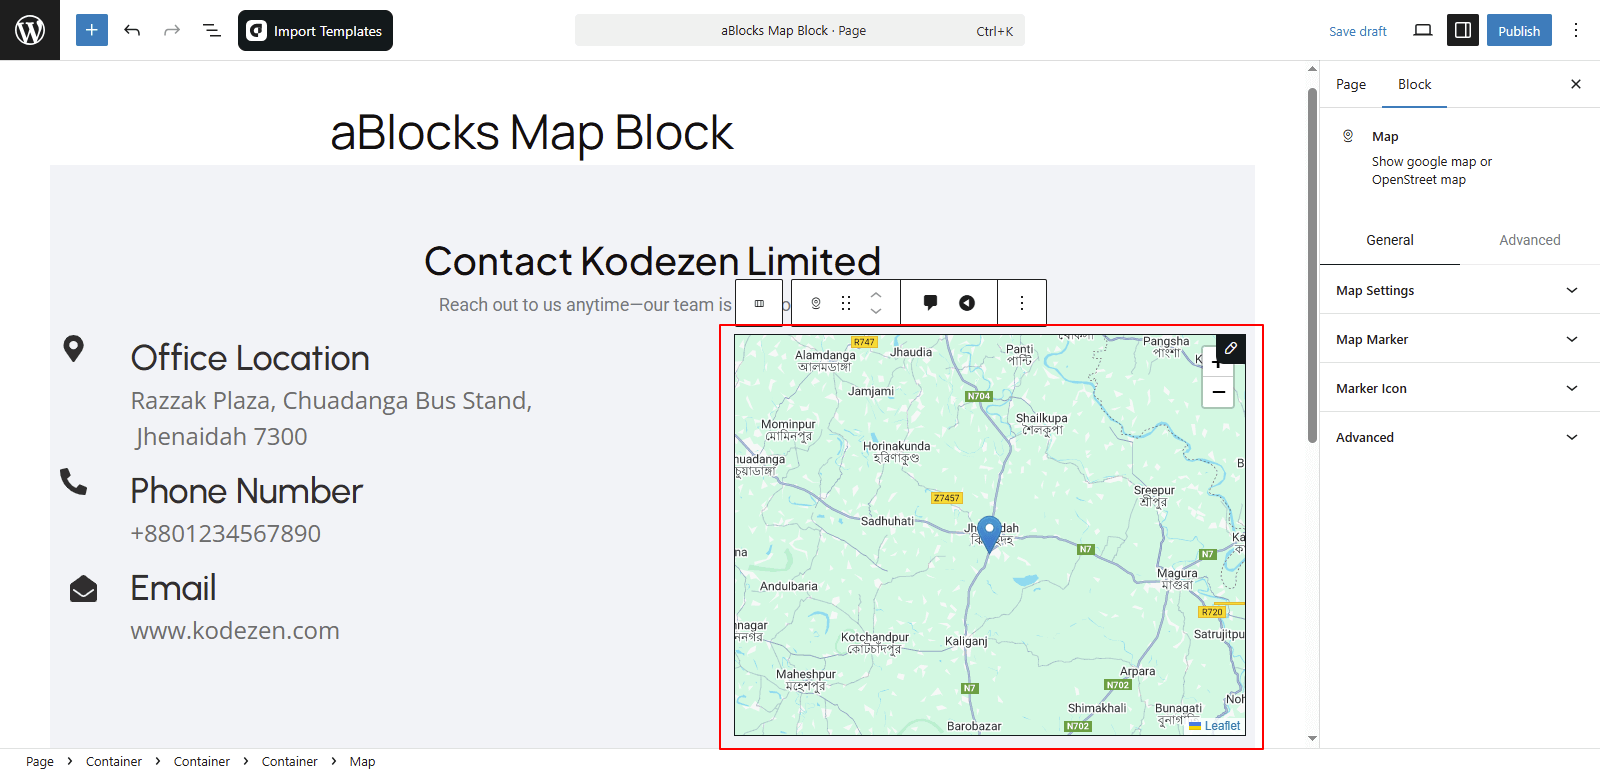
We’ll guide you step by step on how to use and customize the aBlocks Map Block.
Go to the right panel and click on Block > General. You’ll find three main sections there:
- Map Settings
- Map Marker
- Marker Icon
Let’s explore each option step by step.

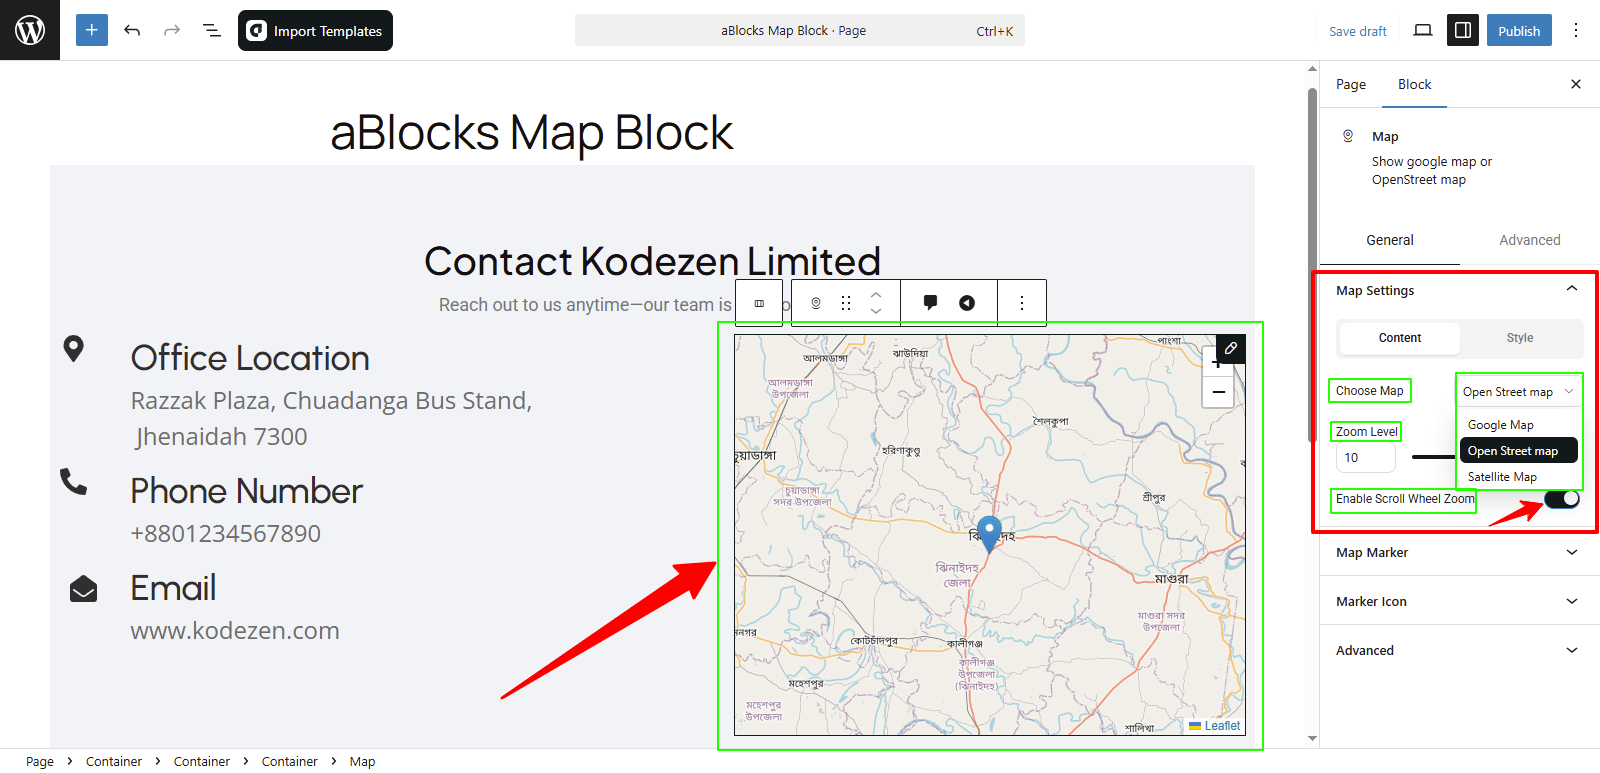
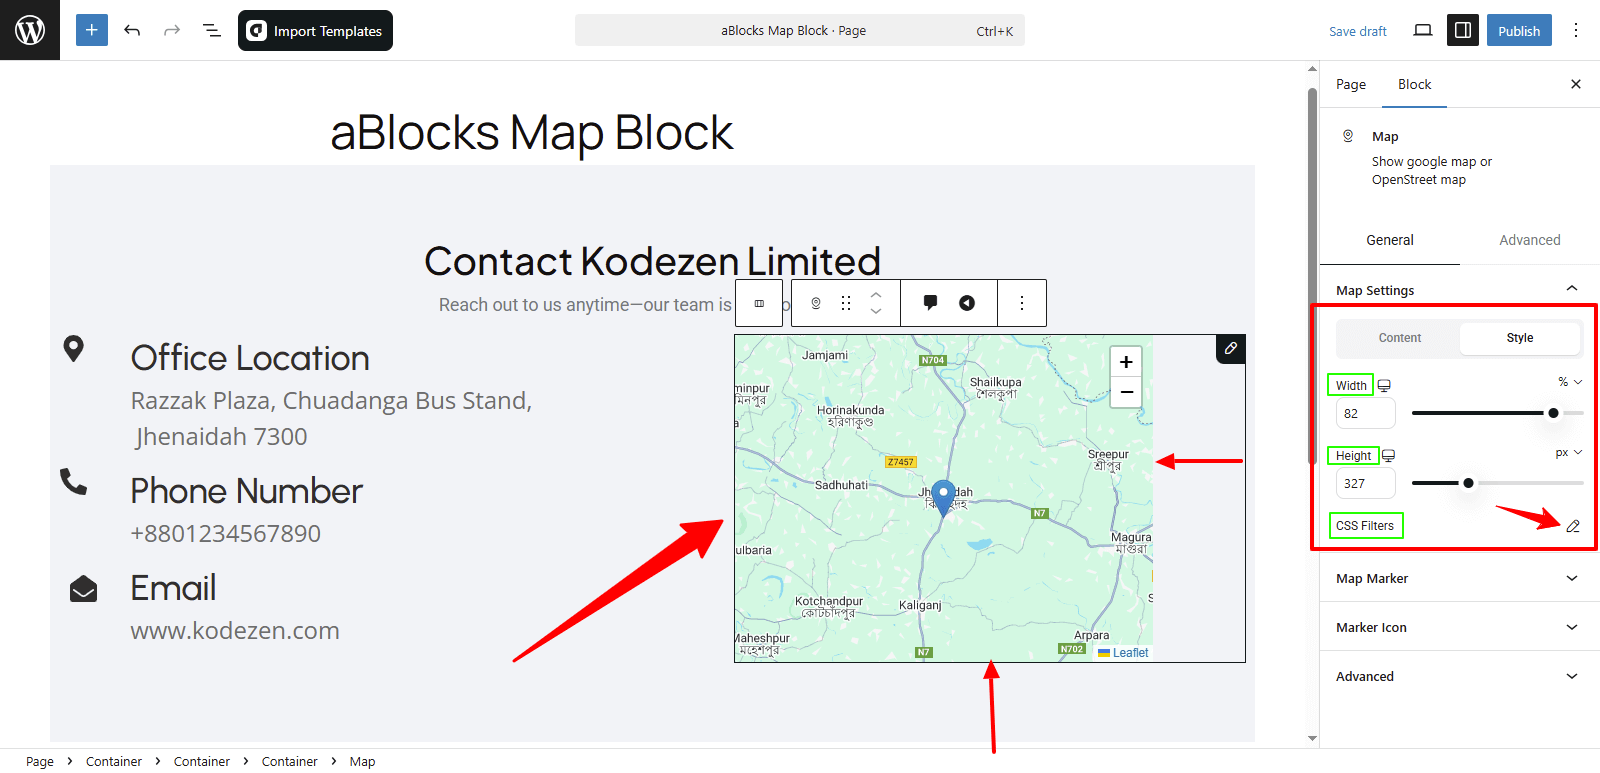
Map Settings
This section has two parts: Content and Style.
Content
Here you’ll find several options to set up your map. Let’s go through them one by one:
Choose Map: Pick the map type you want to display.
- Google Map: Standard Google-powered map with detailed roads and locations.
- Open Street Map: Open-source map that loads faster and doesn’t need an API key.
- Satellite Map: Aerial view with real-world visuals from satellite.
Zoom Level: Increase or decrease how close the map appears.
Enable Scroll Wheel Zoom: Use the toggle to allow or disable zooming with the mouse scroll.
Style
In this section, you’ll find three customization options:
Width: Change the width of the map to fit your layout.
Height: Set how tall the map appears on the page.
CSS Filters: Apply visual effects like blur, brightness, contrast, saturate, or hue to adjust the look of your map.
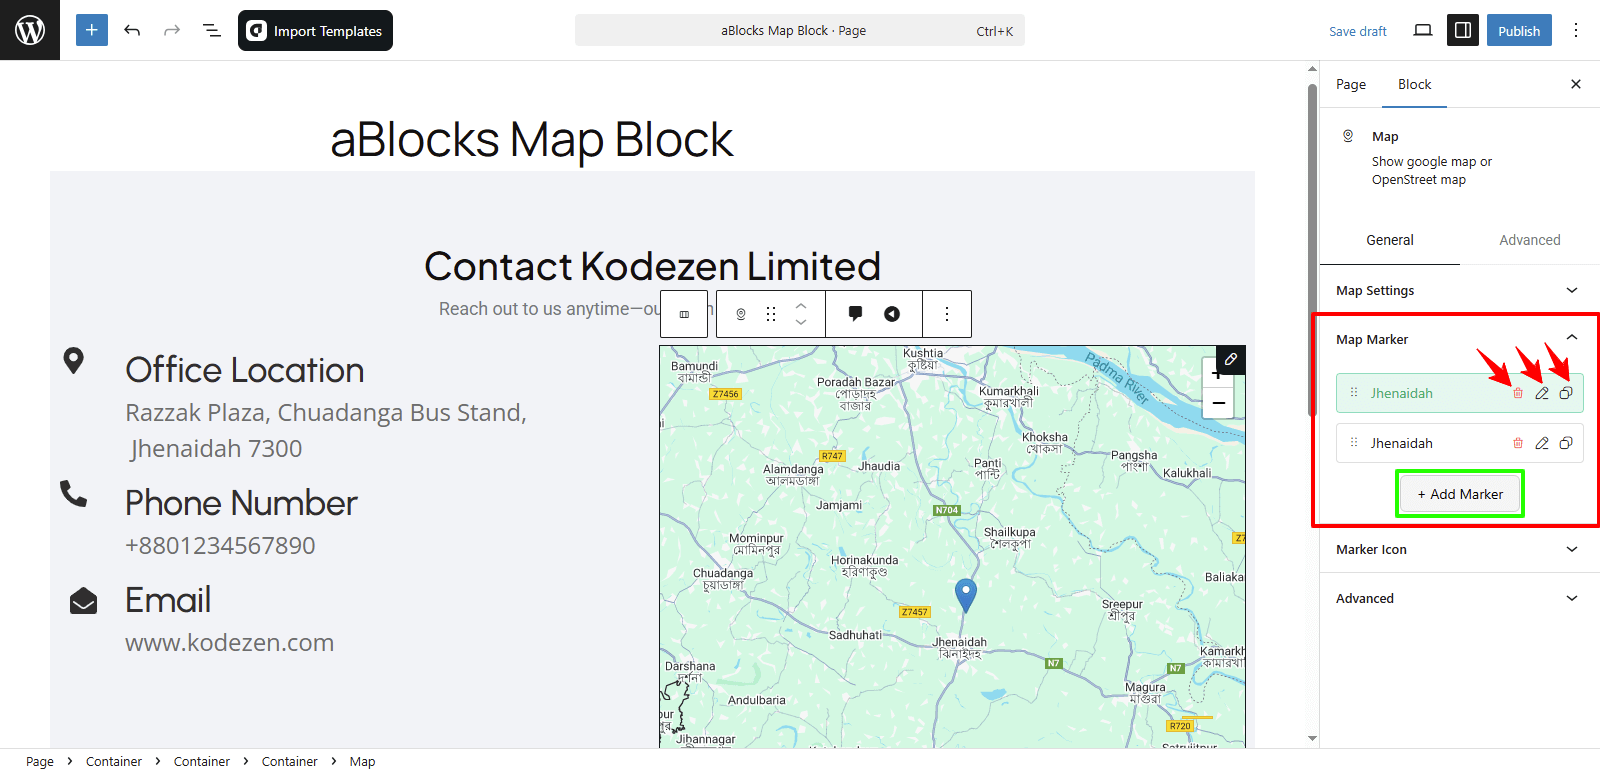
Map Marker
In the Map Marker section, you can manage all your map markers. You can select a marker, add a new one, delete it by clicking the delete icon, or edit it by clicking the edit icon. If you click the duplicate icon, the marker will be copied. You can also click and hold on a marker to drag and drop it to a new location on the map as needed.
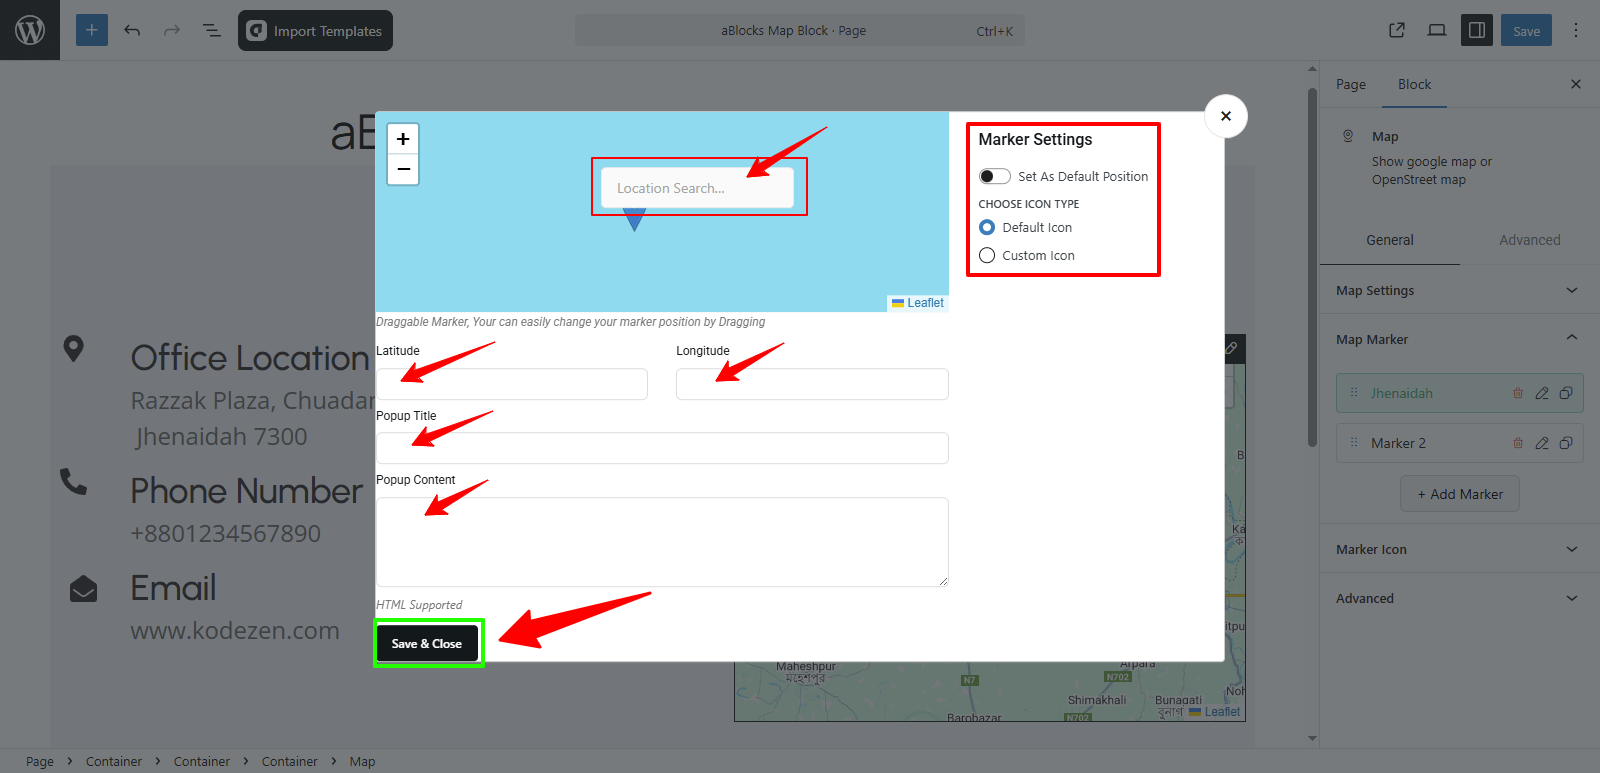
To add a new marker, click on the Add Marker button. A popup will appear where you need to fill out a form. In that popup, you’ll find a search option to find any location directly on the map. This helps you quickly locate your desired position. Then, fill in the following fields: Latitude, Longitude, Popup Title, and Popup Content. After entering the details, click Save & Close, and your marker will be added to the map.
Once the marker is added, you’ll see the Marker Settings options.
Set As Default Position: Use the toggle button to make this marker the default center of your map.
Choose Icon Type: You can choose between two types of icons:
- Default Icon
- Custom Icon (upload your own image or icon)
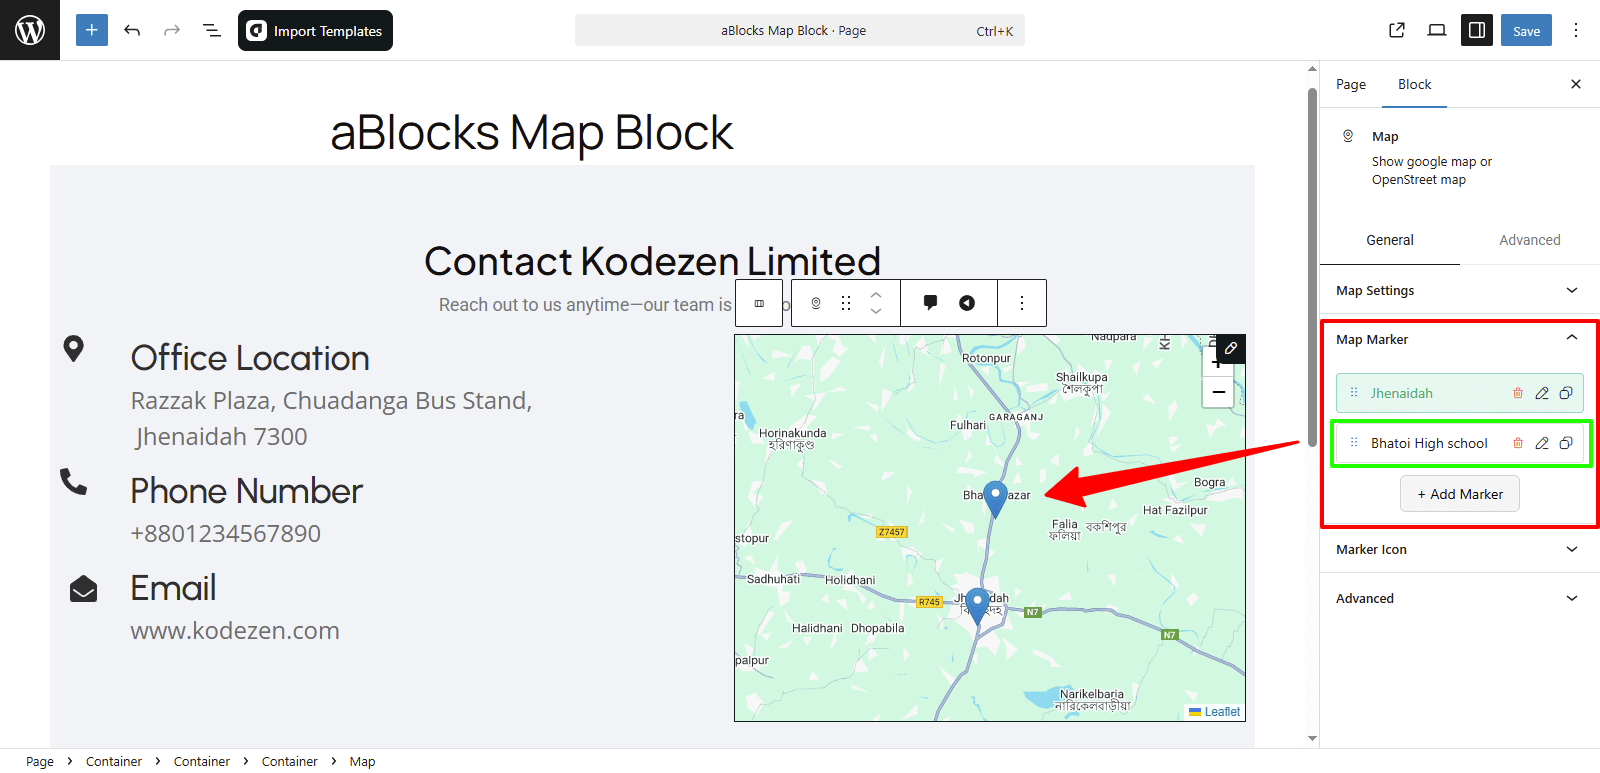
Now you can see your newly added map marker.
Marker Icon
Icon Height: You can increase or decrease the height of the icon as needed.
Icon Width: You can adjust the width of the icon to match your design.

Conclusion
The aBlocks Map Block is a helpful tool for adding interactive maps to your WordPress pages. You can easily pick your map type, adjust zoom, and add multiple markers with custom icons and popup info. The block gives you full control over how the map looks and works—all inside the Gutenberg editor. It’s a quick way to make location details clear and user-friendly.
If you have any questions or need assistance, feel free to contact our support team. We’re here to help!