





The aBlocks Container Block lets you create structured layouts by grouping multiple blocks inside a flexible container. This block is perfect for organizing content, creating sections, and maintaining consistent spacing across your WordPress site.
This documentation covers setup, customization options, and best practices to help you seamlessly integrate the Container Block into your website.
Add aBlocks Container Block
Open your WordPress dashboard and edit a page or post where you want to add the new container. You can also insert it into a new page or post to start from scratch.
Click the plus icon on the page or top left of your page. Search for “Container” and simply click on the aBlocks container block.

Also, you can take the container by clicking the plus icon (+) from the bottom quick action section.

When you will click on Container you will see many types of container layouts. Select the layout that you need and simply click on that.
How to Customize aBlocks Container Block
To customize click the container block go to Block>General and explore the vast library of aBlocks container block. You can open the editor list view sidebar to navigate all the containers easily.

Customize the Container
The aBlocks Container Block is a fundamental layout element in the aBlocks page builder, providing a flexible and customizable structure for arranging content. This block allows users to control width, height, overflow behavior, and item direction, enabling the creation of responsive and visually appealing designs.
Container
Container Width: This setting allows you to define the overall width of the container. You can choose from three options:
- Full Width: Extends the container to the full width of the screen.
- Boxed: Constrains the container within a predefined width, ensuring a more structured layout.
- Custom: Allows you to set a specific width for the container.
Content Width: This option defines the width of the content inside the container. Users can manually adjust the width using the pixel-based slider or enter a specific value. You can set the unit to %, CM, REM, and VW.
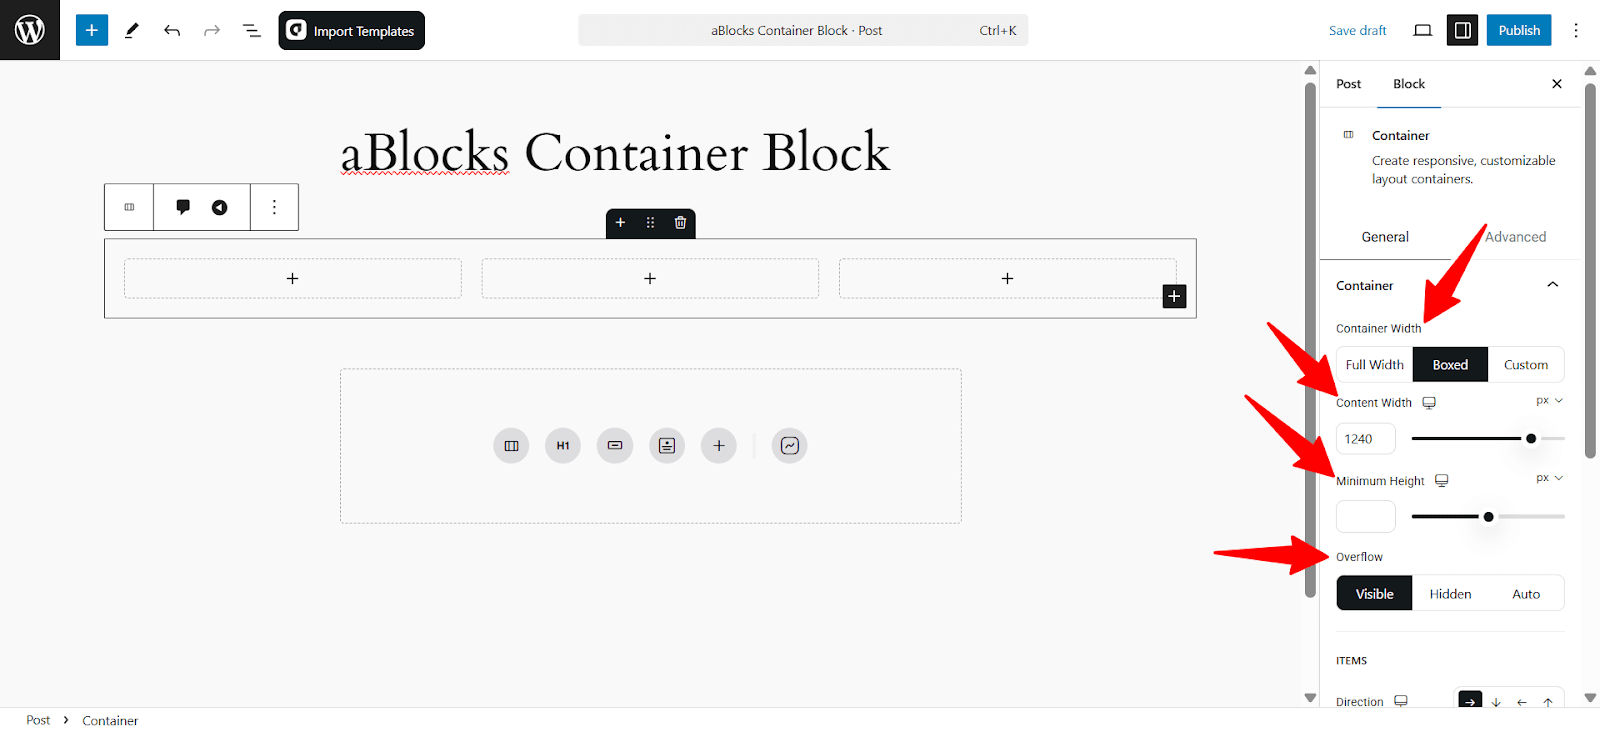
Minimum Height: This setting allows you to define the minimum height of the container. Users can manually adjust the height using a slider or enter a specific value.
Overview: This setting determines how content inside the container behaves when it exceeds the defined size.
- Visible: The overflowing content remains visible outside the container.
- Hidden: The excess content is hidden from view.
- Auto: Automatically adds a scrollbar if the content exceeds the container’s dimensions.
Items
The Items section provides control over how elements within the container are arranged.
- Direction: Choose the alignment of inner items:
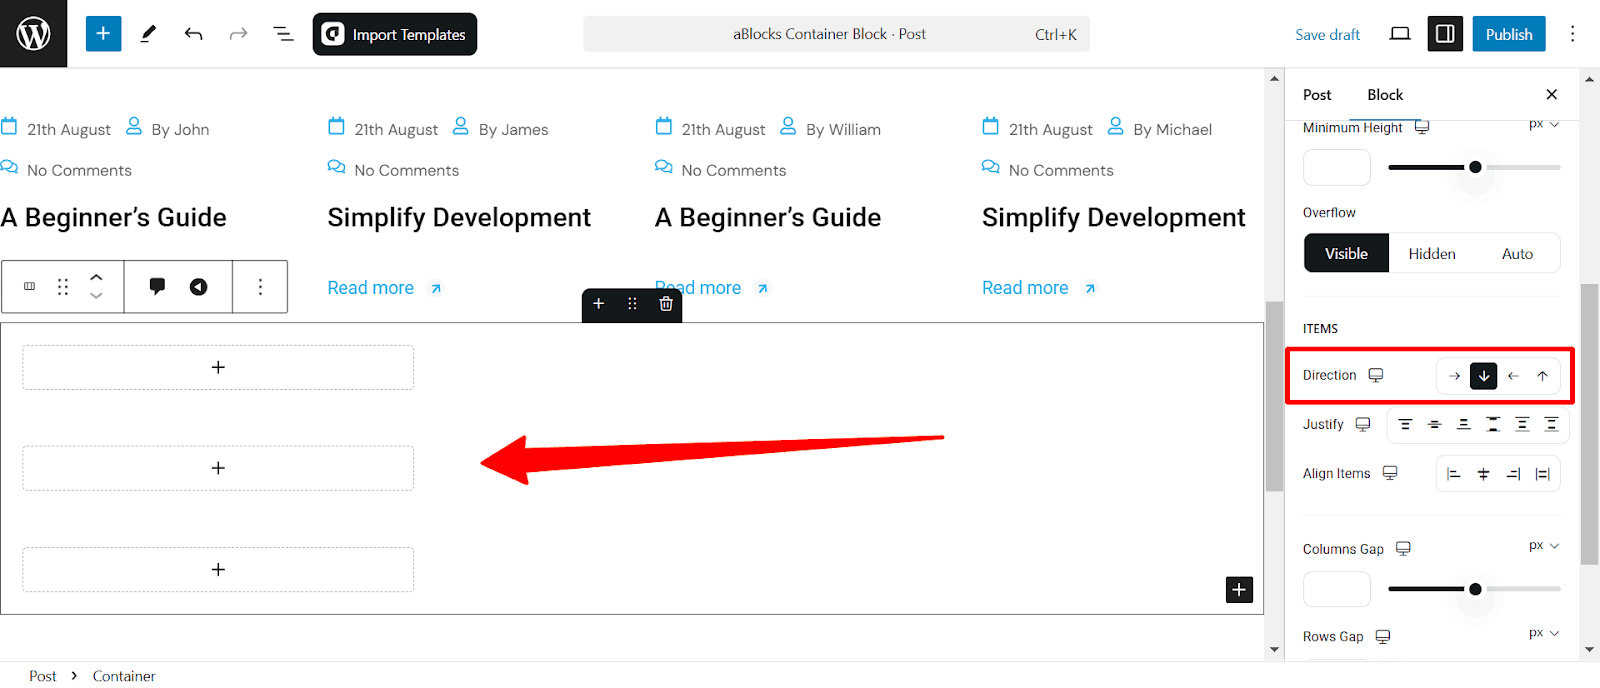
- Row (→): Items are placed horizontally.
- Column (↓): Items are stacked vertically.
- Reverse Row (←): Items are placed in reverse horizontal order.
- Reverse Column (↑): Items are placed in reverse vertical order.
- Justify Content: Defines how items are distributed along the main axis. Options include:
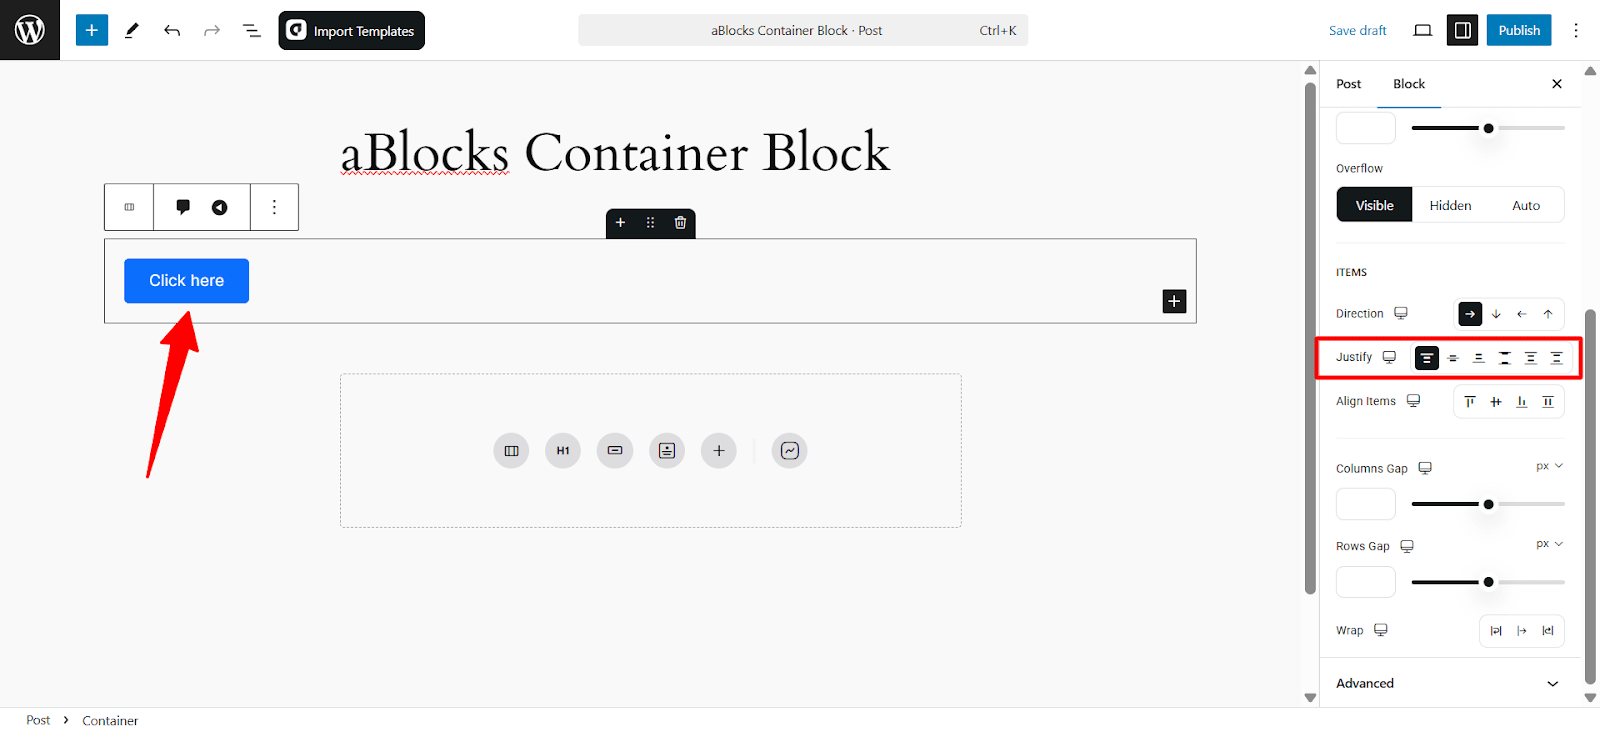
- Start: Align items to the start.
- Center: Center items within the container.
- End: Align items to the end.
- Space Between: Distribute items evenly with no space at the edges.
- Space Around: Items are spaced evenly with gaps around them.
Space Evenly: Items are spaced equally across the entire container.
- Align Items: Adjusts vertical alignment of items:

- Start: Align items at the top.
- Center: Align items in the middle.
- End: Align items at the bottom.
- Stretch: Items stretch to fill the container.
- Columns Gap & Rows Gap: Adjust the spacing between columns and rows using a pixel input or slider. You can set the unit to %, CM, REM, and VW.

- Wrap Options:
- No Wrap: Items remain in a single line.
- Wrap: Items wrap onto the next line if needed.
- Reverse Wrap: Items wrap in reverse order.
Everything you need to know about the aBlocks Container Block! With complete control over width, alignment, spacing, and positioning, users can create structured and responsive sections effortlessly.
If you need any assistance, our dedicated support team is always ready to help—reach out anytime, and we’ll resolve any issues for you!