


Welcome to aBlocks Heading block documentation. Make an attractive heading to engage visitors on your post and page. In this documentation, we will guide you first to last on how to customize your heading blocks and their advanced settings. Let’s start it.
Heading Block
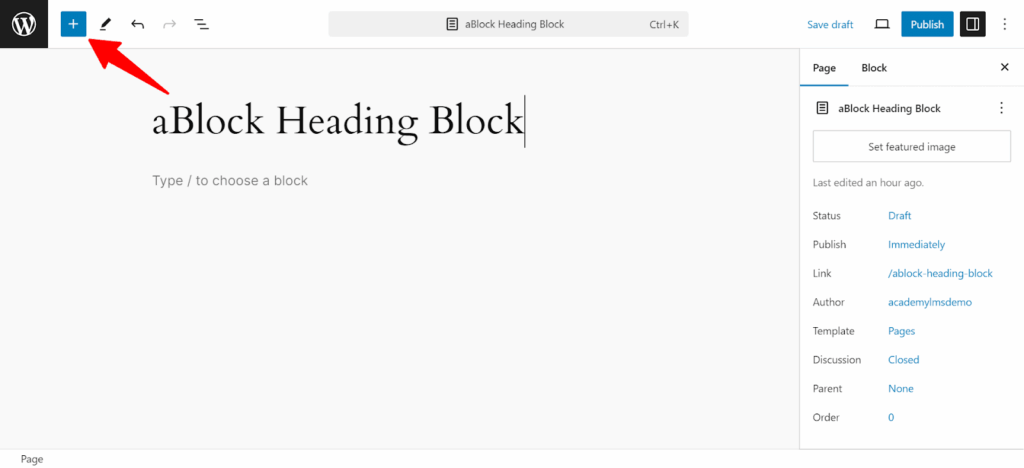
First, navigate your website admin dashboard. Then, select the add new page or add a new post. A new page will appear. Now to add the heading block, click the plus (+) icon on the top left corner.
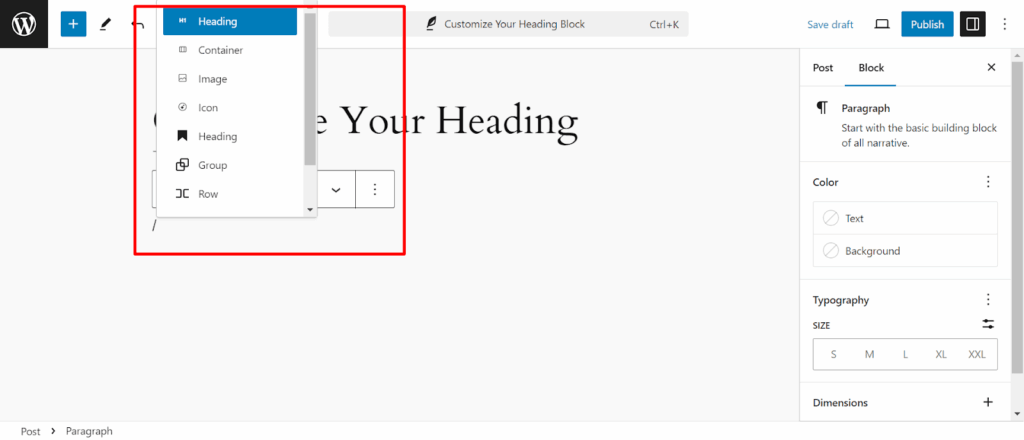
After clicking the plus (+) you can see all the blocks of aBlock. Take a heading by clicking on Heading. Also, you can take a heading from the page. Type ( / ) Slash on the page, and you will see the option to take a heading, just click on Heading.
And, you have successfully added the aBlocks heading block.
To customize the heading, select the heading first by clicking on it. Then you will see a lot more options for customization on the block settings section on the right side.
Let’s show you the customization options one by one.
General
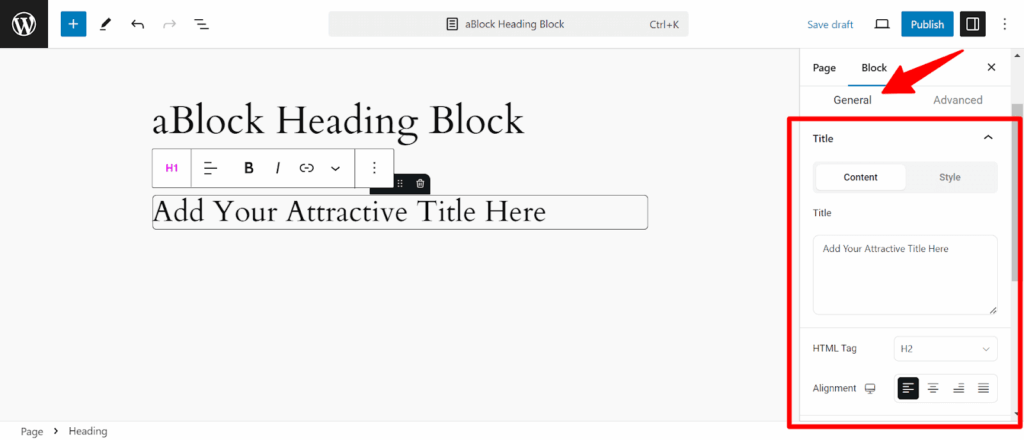
In General, You can see two options: Content and Style.
Content
In general, the content section will be automatically selected, you can change several things about your block from here.
Title: First, you can see a text box here. You can change your title from here. Or, you can directly type your desired title in the editor itself.
Then comes the HTML tag.
HTML Tag: There are a few hN tags (h1-h6, DIV, SPAN, P)You can select the hN tag based on your requirements from the dropdown here.
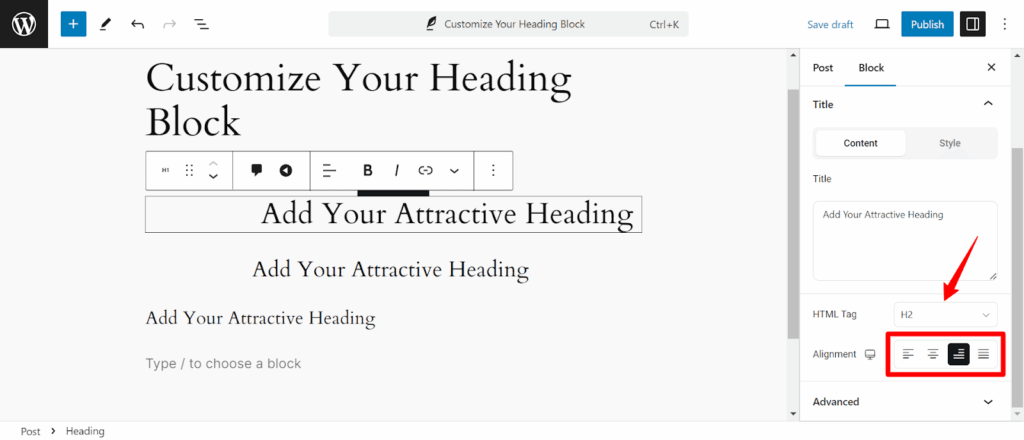
Alignment: In the alignment section you can change your Title position to the left, middle, or right.
Style
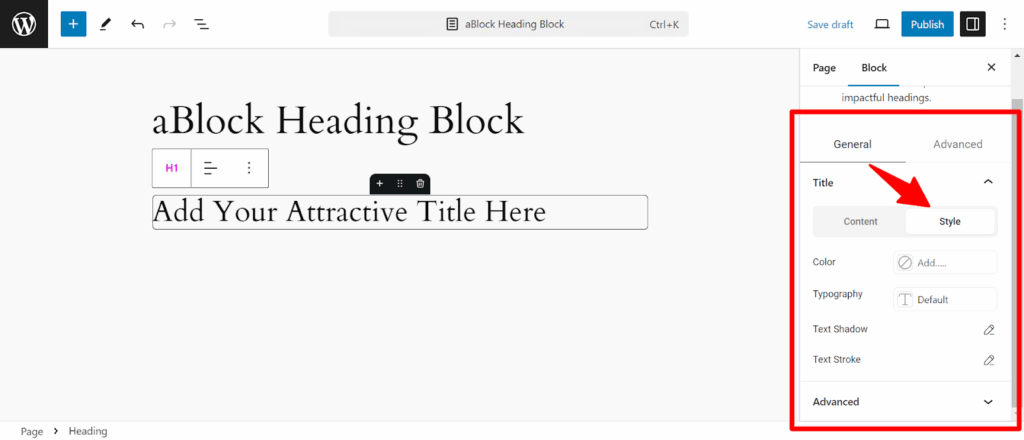
Now comes the style section. Here you can customize your Heading to make it attractive.
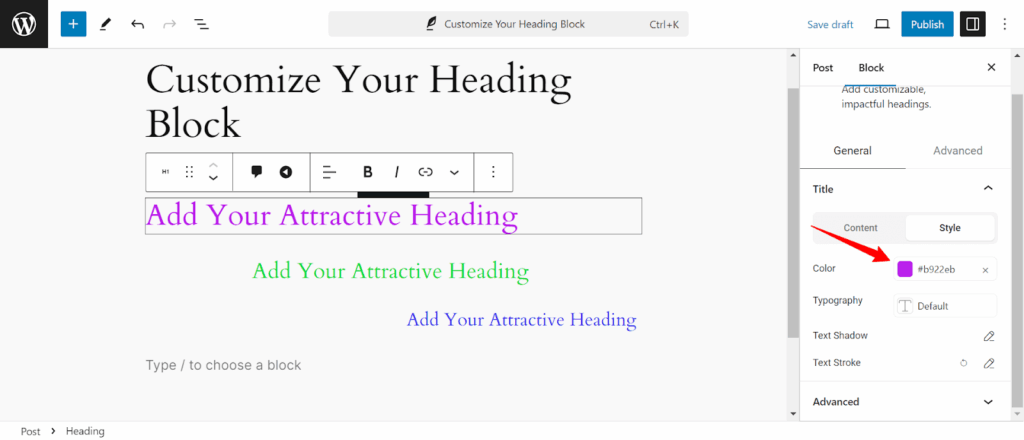
Color: In the Colour section you can change your Heading color.
Typography: You’ll get advanced typography-related settings to customize the heading.
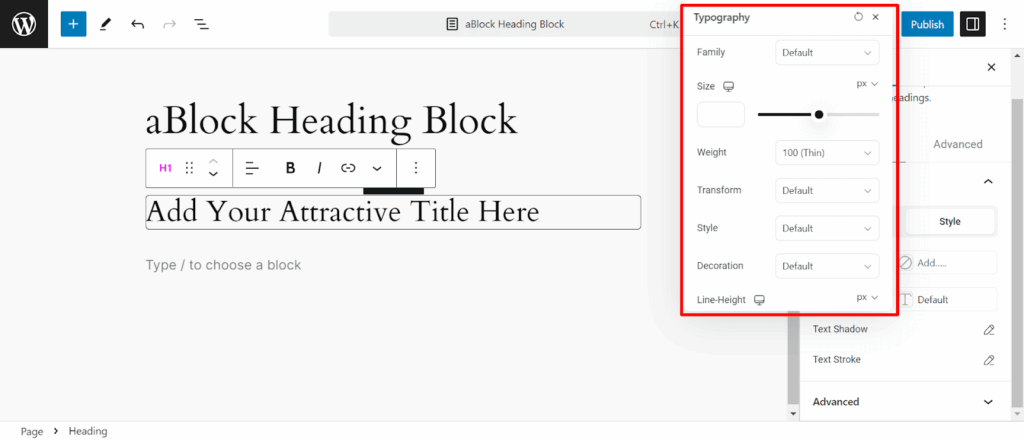
Family: First, you’ll find the Family section. Here, you can choose from a variety of fonts to create the perfect title.
Size: Normally your selected heading will have a default size but you can change it with aBlocks. Simply drag the pointer to change the size of your title. Also, you can change it by typing your text size on the box.
Weight: You can change the Weight of your title from here. Wight refers to the boldness of your targeted text.
Transform: You can Transform your title in Uppercase, Lowercase, and Capitalize.
Style: After that, you will find the style customizer. Here you can change the font style to Normal, Italic, and Oblique.
Decoration: You can decorate your title in this section like, underline, overline, and line through.
At last, you can customize the title Line-Height, Letter Spacing, and Word spacing. You can change it on PX, REM, and CM.
Now come back to the Style section and other options. After the Typography you will see the option Text Shadow.

Text Shadow: Text shadow allows you to add a shadow to your title. Also, you can change the title shadow color from the text-shadow option. Now, Let’s customize your title shadow.
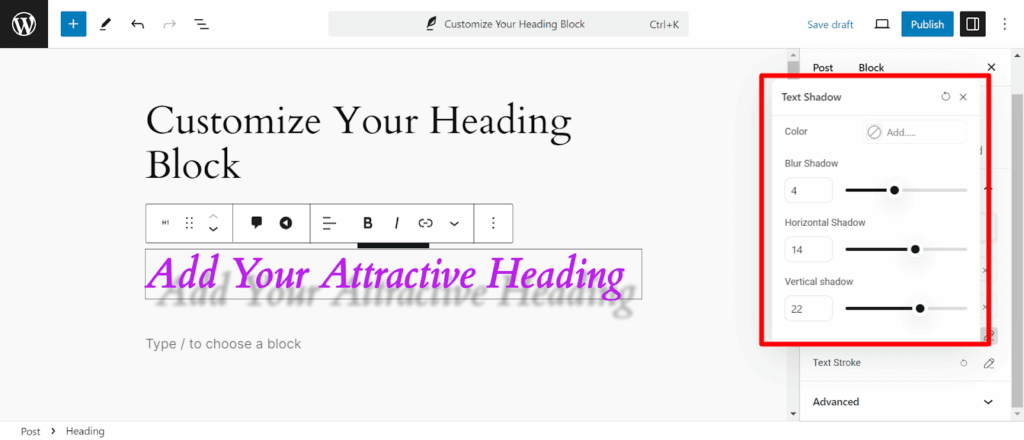
Blur Shadow: You can change the blur amount of the shadow in this section.
Horizontal Shadow: You can change the horizontal position of the shadow by dragging the pointer.
Vertical shadow: This is the same as Horizontal Shadow. You can change the Vertical position of the shadow here.
Text Stroke: At last comes the Text Stroke option. You can change the Text Stoke from here.
To learn more about the Text Shadow and Text Stroke read the the Documentation.
Advanced
Now comes the Advanced option. You’ll have the option for the following settings here:
- Layout
- Transform
- Background
- Border
- Mask
- Responsive

All the aBlocks Gutenberg Blocks have the similar Advanced customization settings. That’s why we are not discussing them here.
Be sure to check out our Advanced Setting Doc to learn about the advanced customization settings in detail.