





The aBlocks Theme Builder gives you the tools to design essential parts of your WordPress site visually and efficiently. With its intuitive block-based interface, you can create and manage layout components without touching any code.
- Uses of aBlocks Theme Builder
- Let’s See How It Works in Action
- Designing a Custom Header with aBlocks Theme Builder
- Customize the Header with aBlocks
- Building a Footer
- Customize the Footer with aBlocks
- Adding a Footer Before Section
- Creating and Using Custom Blocks
Uses of aBlocks Theme Builder
With aBlocks Theme Builder, you can build and customize:
- Header – Design your site’s top navigation and branding area.
- Footer – Create a professional footer with menus, widgets, and call-to-actions.
- Footer Before – Add an optional section above your main footer for announcements, CTAs, or promotional content.
- Custom Blocks – Build reusable custom block layouts that can be used across different pages or templates.
These elements give you greater control over your site’s structure and design, all within the native WordPress block editor.
Let’s See How It Works in Action
In the following sections, we’ll show you step-by-step how to create each of these elements using the aBlocks Theme Builder — from selecting templates to assigning display conditions.
Ready to start building? Let’s dive in.
Designing a Custom Header with aBlocks Theme Builder
Learn how to create and assign a fully customized header for your site.
Getting Started
To begin designing a custom header, navigate to the aBlocks Theme Builder from your WordPress dashboard. Click the “Add New” button to start creating a new template.
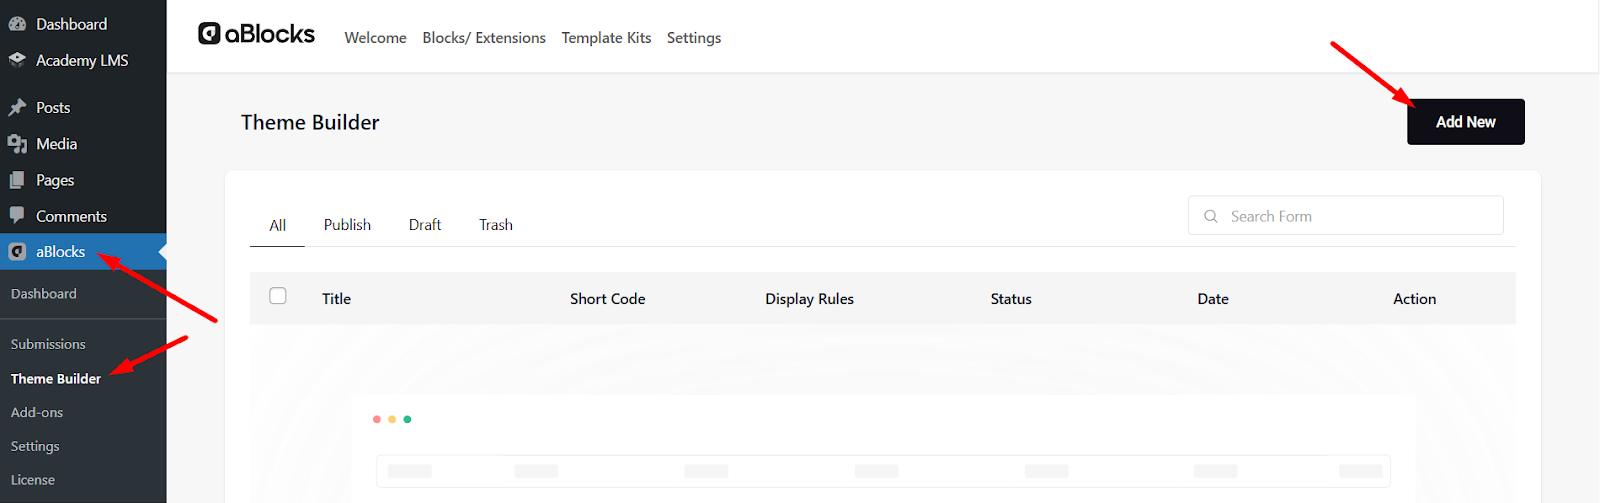
Important: The aBlocks Theme Builder is only compatible with the Classic Theme. Ensure you have a Classic-based theme installed and activated before proceeding.
Step 1: Set a Title and Choose Template Type
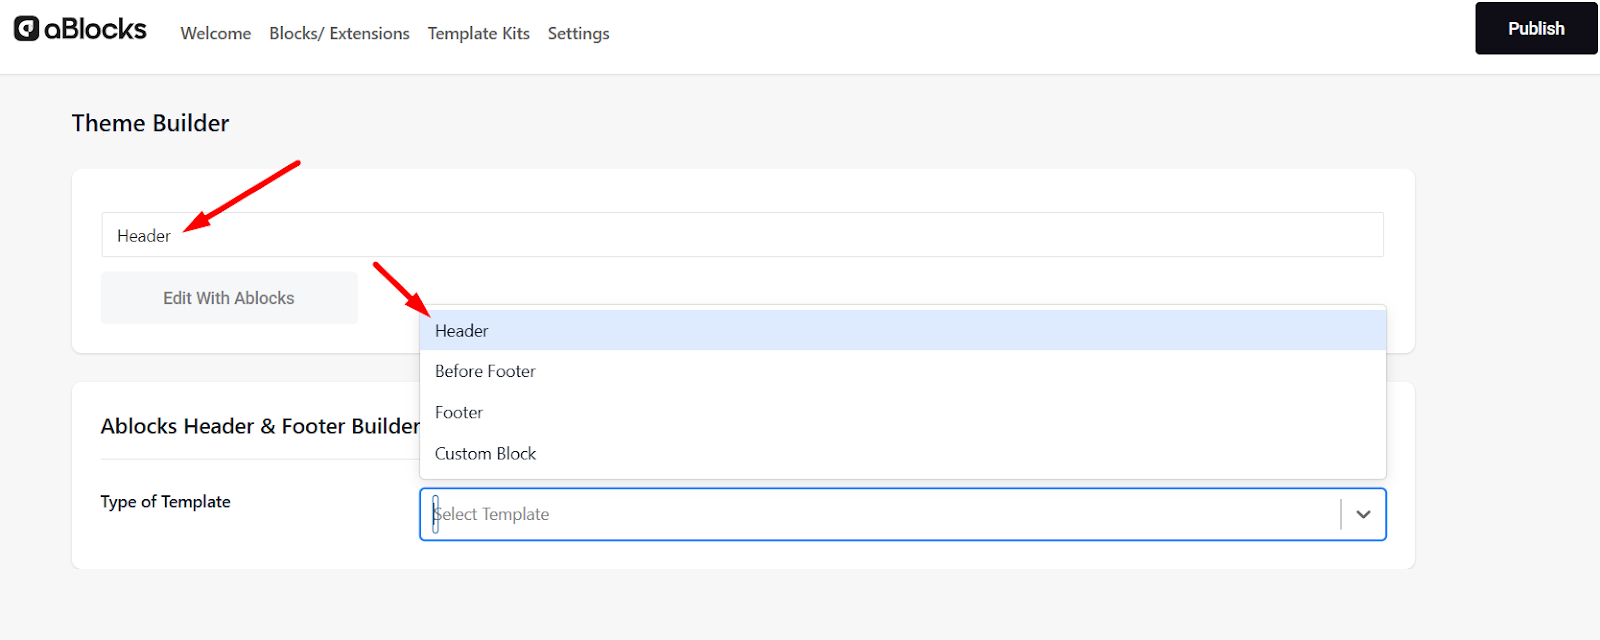
Give your header template a descriptive title for easy identification. Then, select “Header” as the template type from the dropdown menu.
Step 2: Configure Display Rules
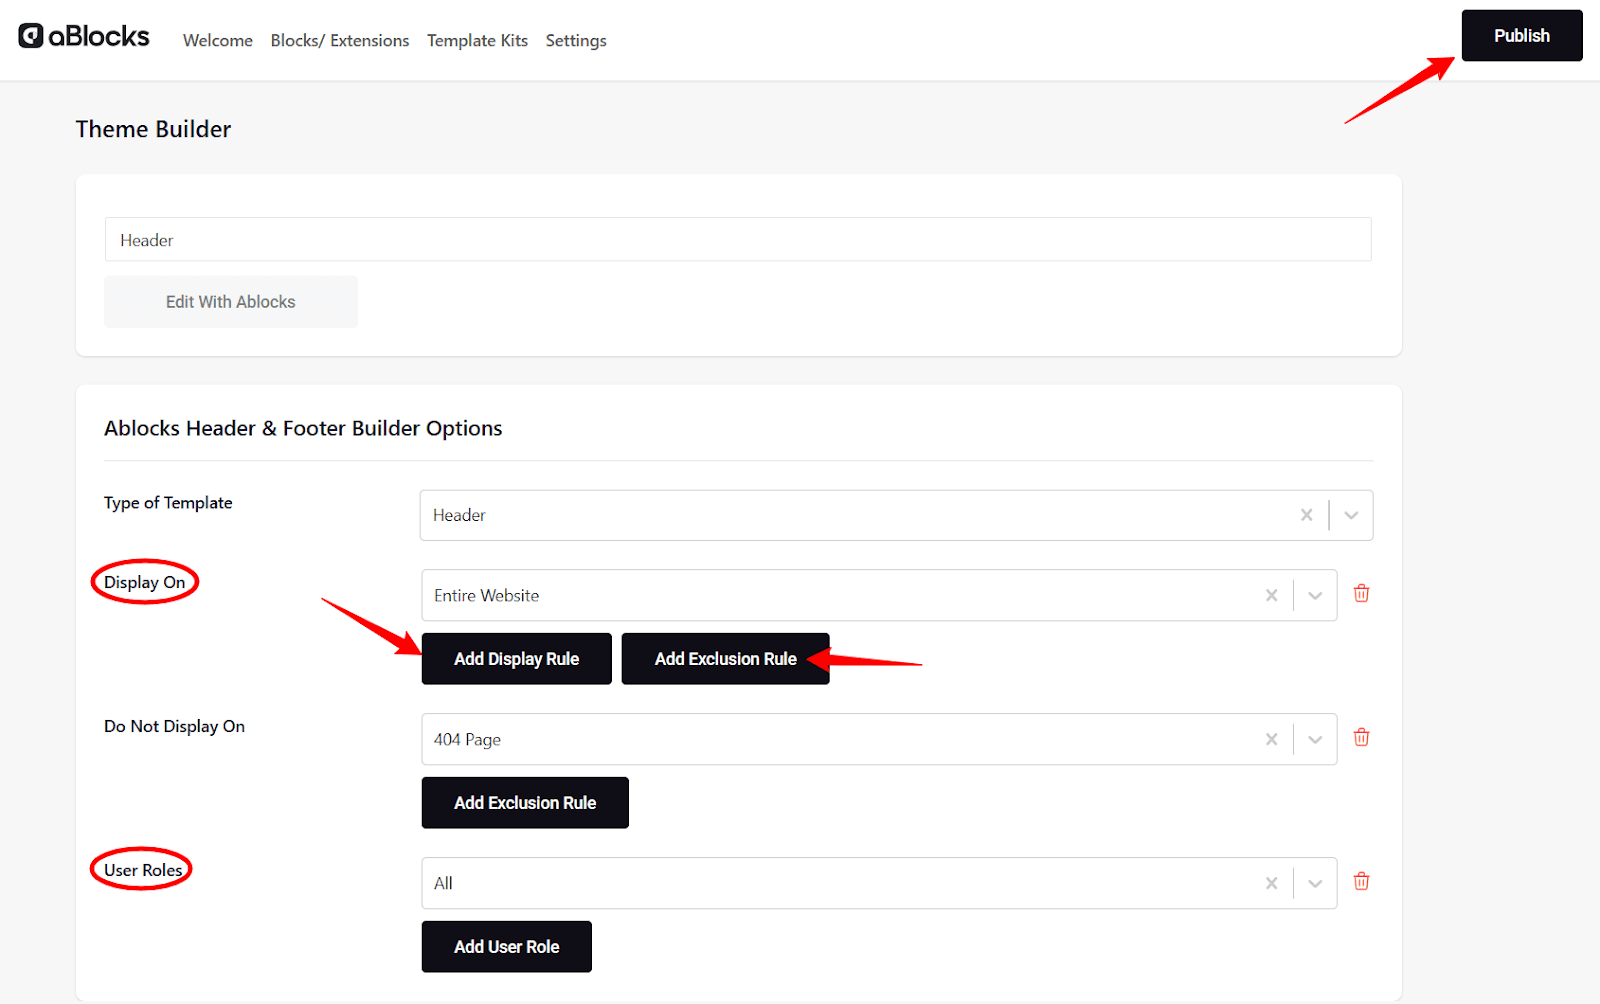
Use the Display Rules panel to determine where your custom header will appear on your site. You can:
- Apply the header site-wide
- Target specific pages (e.g., Homepage, Blog, Product Pages)
- Use conditions based on post types, taxonomies, archive template or custom queries
Step 3: Add Exclusion Rules (Optional)
If you want to hide the header on specific pages or conditions, you can set up Exclusion Rules. These work alongside display rules and allow for precise control over visibility.
- Exclude by specific page or post
- Exclude by user-defined conditions
- Stack multiple exclusions if needed
Note: You can add multiple display and exclusion rules to tailor the visibility of your header to your exact needs.
Step 4: Assign User Role Visibility
Control who sees your custom header by assigning visibility based on user roles. After everything you have done, publish the header.
Customize the Header with aBlocks
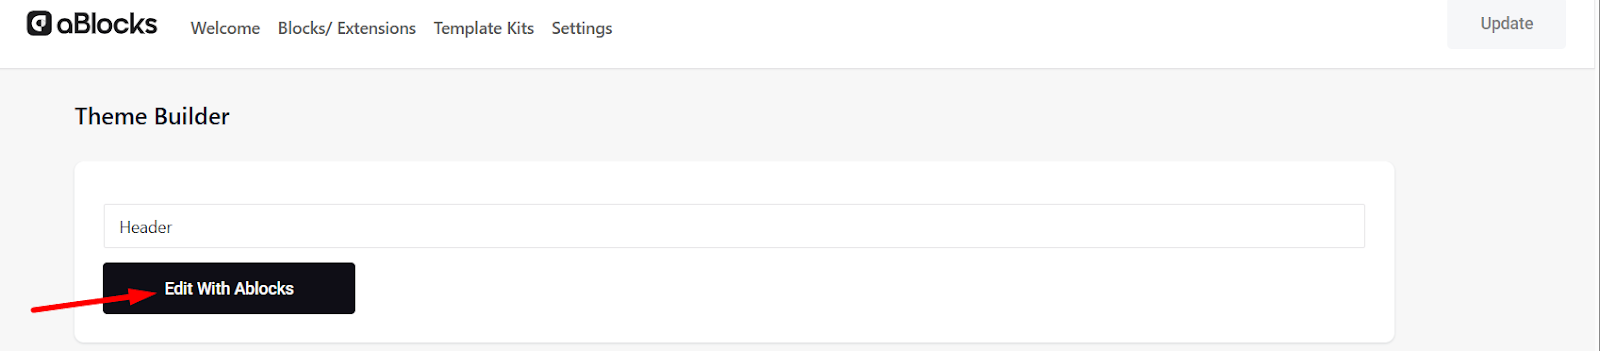
Step 6: Launch the aBlocks Editor
After publishing, click on the “Edit with aBlocks” button to open the visual editor and start designing your header layout.
Step 7: Insert Header Blocks

In the aBlocks editor:
- Click on the ➕ Plus icon to insert a new block
- Use the search bar to find the “Menu” block
- Insert the block into your header section
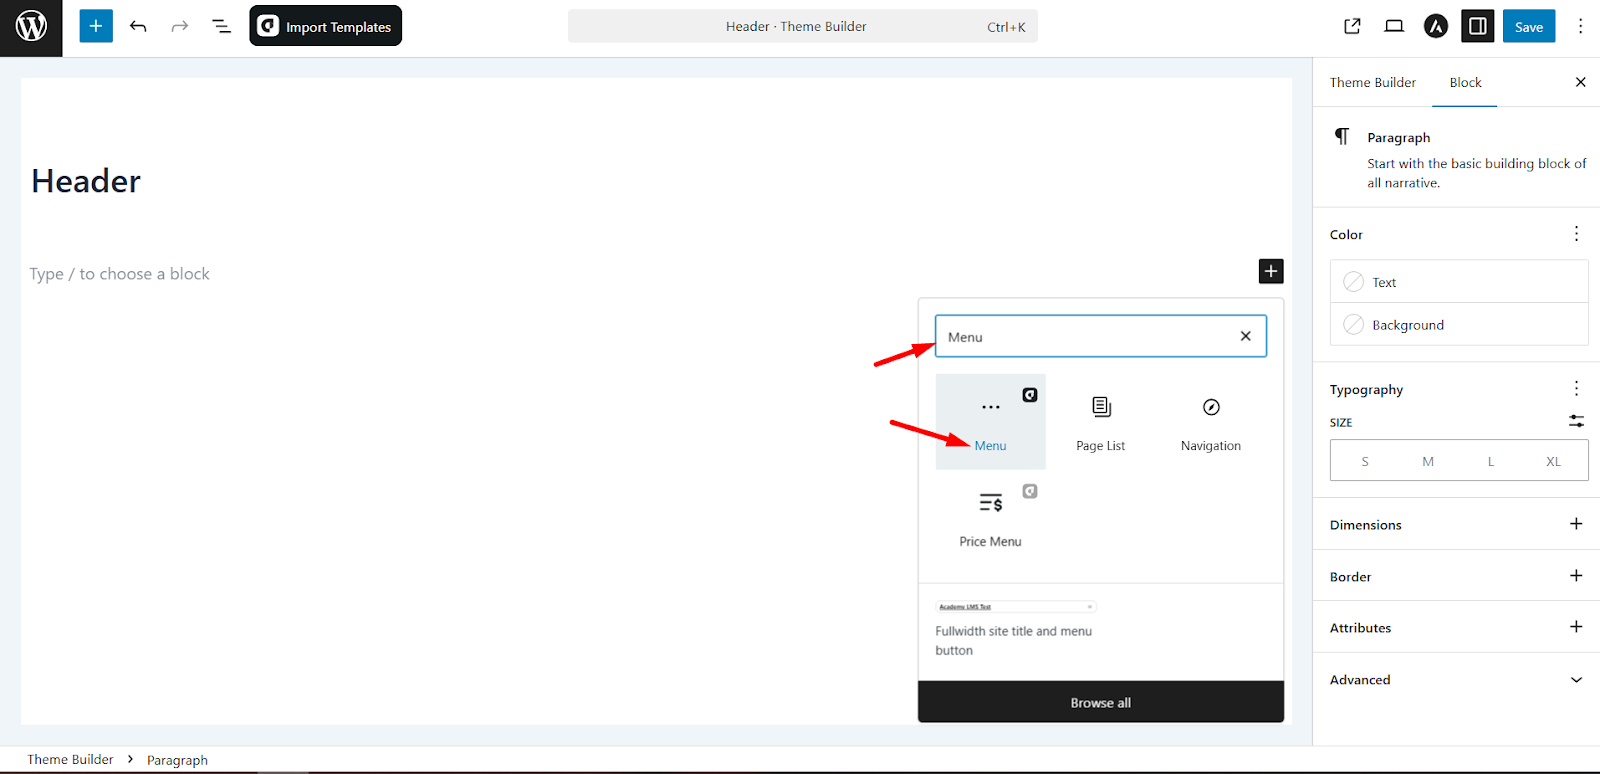
Once the menu block is added, it will automatically display your selected navigation menu. You can now start customizing the look, alignment, style, and behavior of the menu to fit your brand and layout preferences.
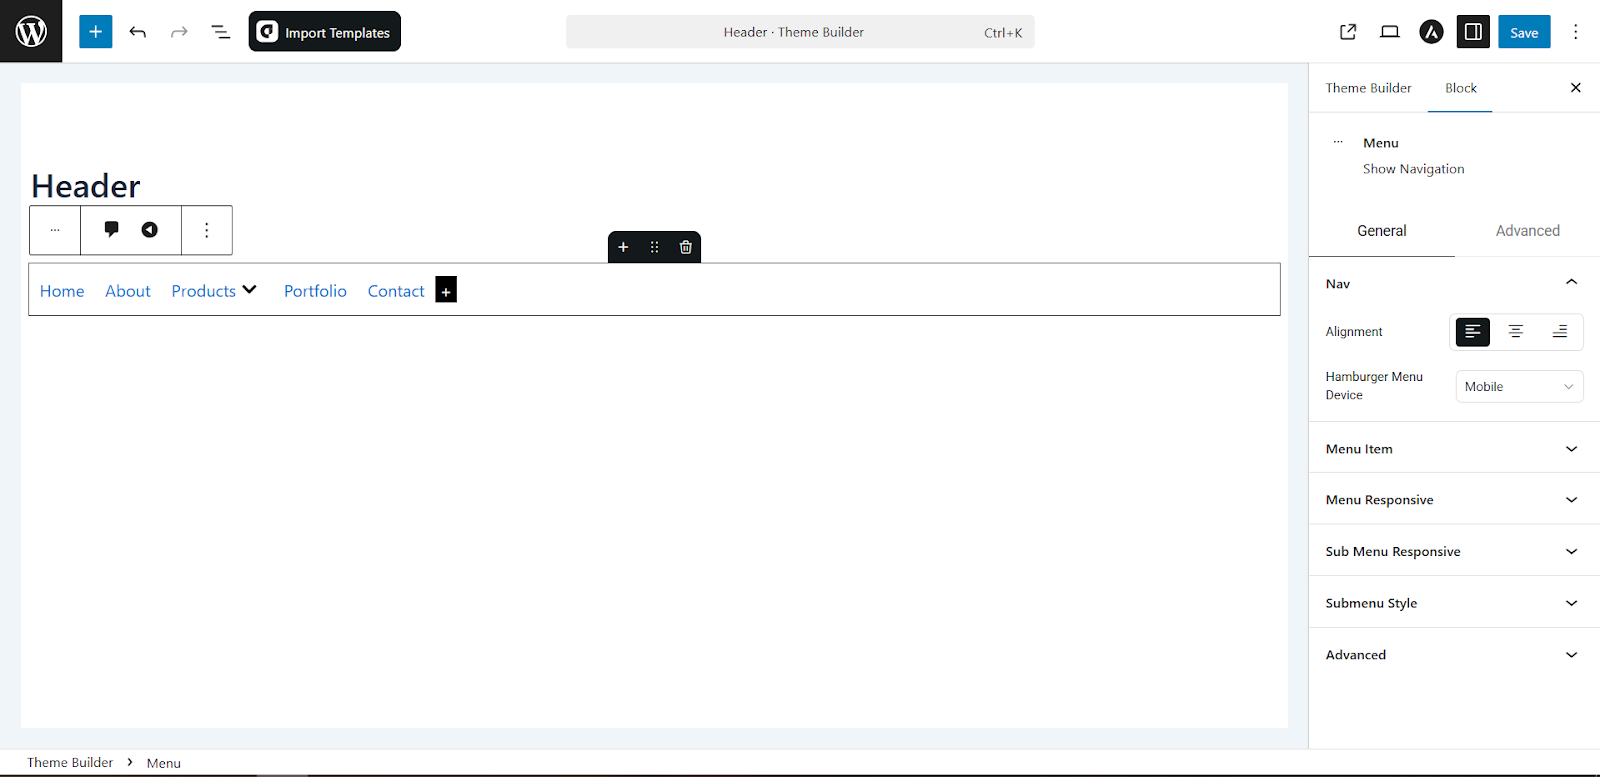
aBlocks provides a wide range of flexible blocks you can use to enrich your header.
You have full creative control to design a header that not only looks great but also improves usability and site navigation.
Building a Footer
Step-by-step guide to designing your footer with menus, widgets, and CTAs.
Step 1: Create a Footer Template
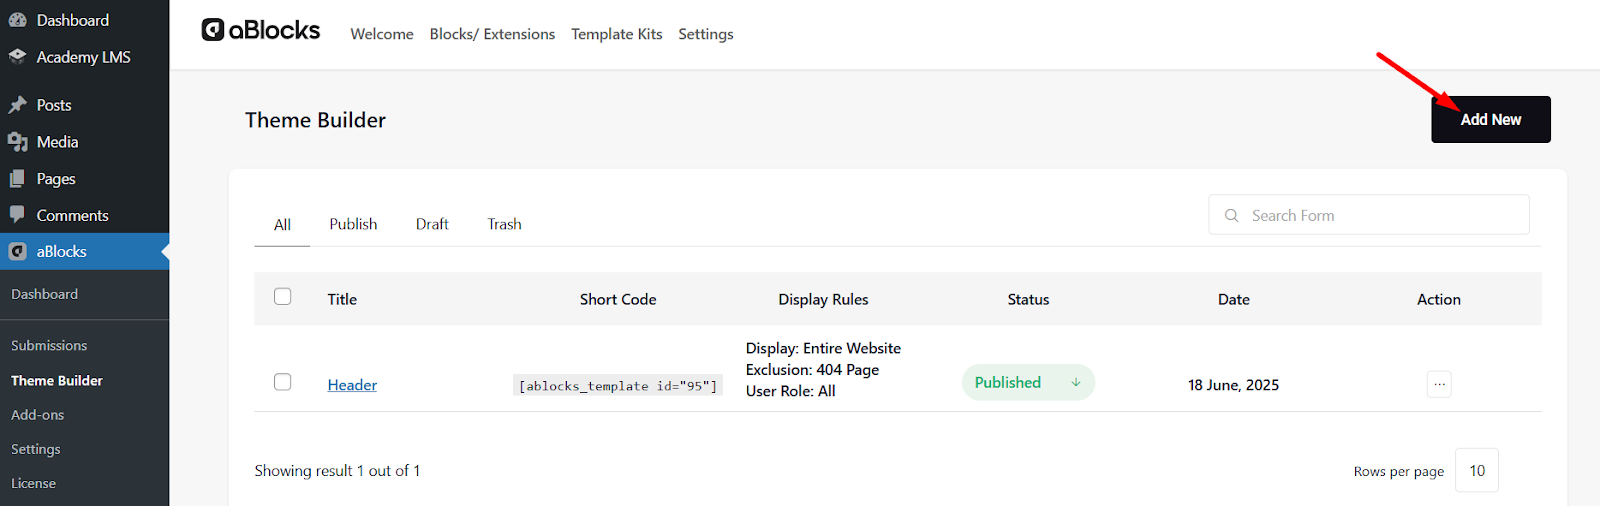
To start building your footer, go to the aBlocks Theme Builder from your WordPress dashboard and click the “Add New” button.
- Set a title for your footer template
- Choose “Footer” as the Template Type
Step 2: Define Display Conditions
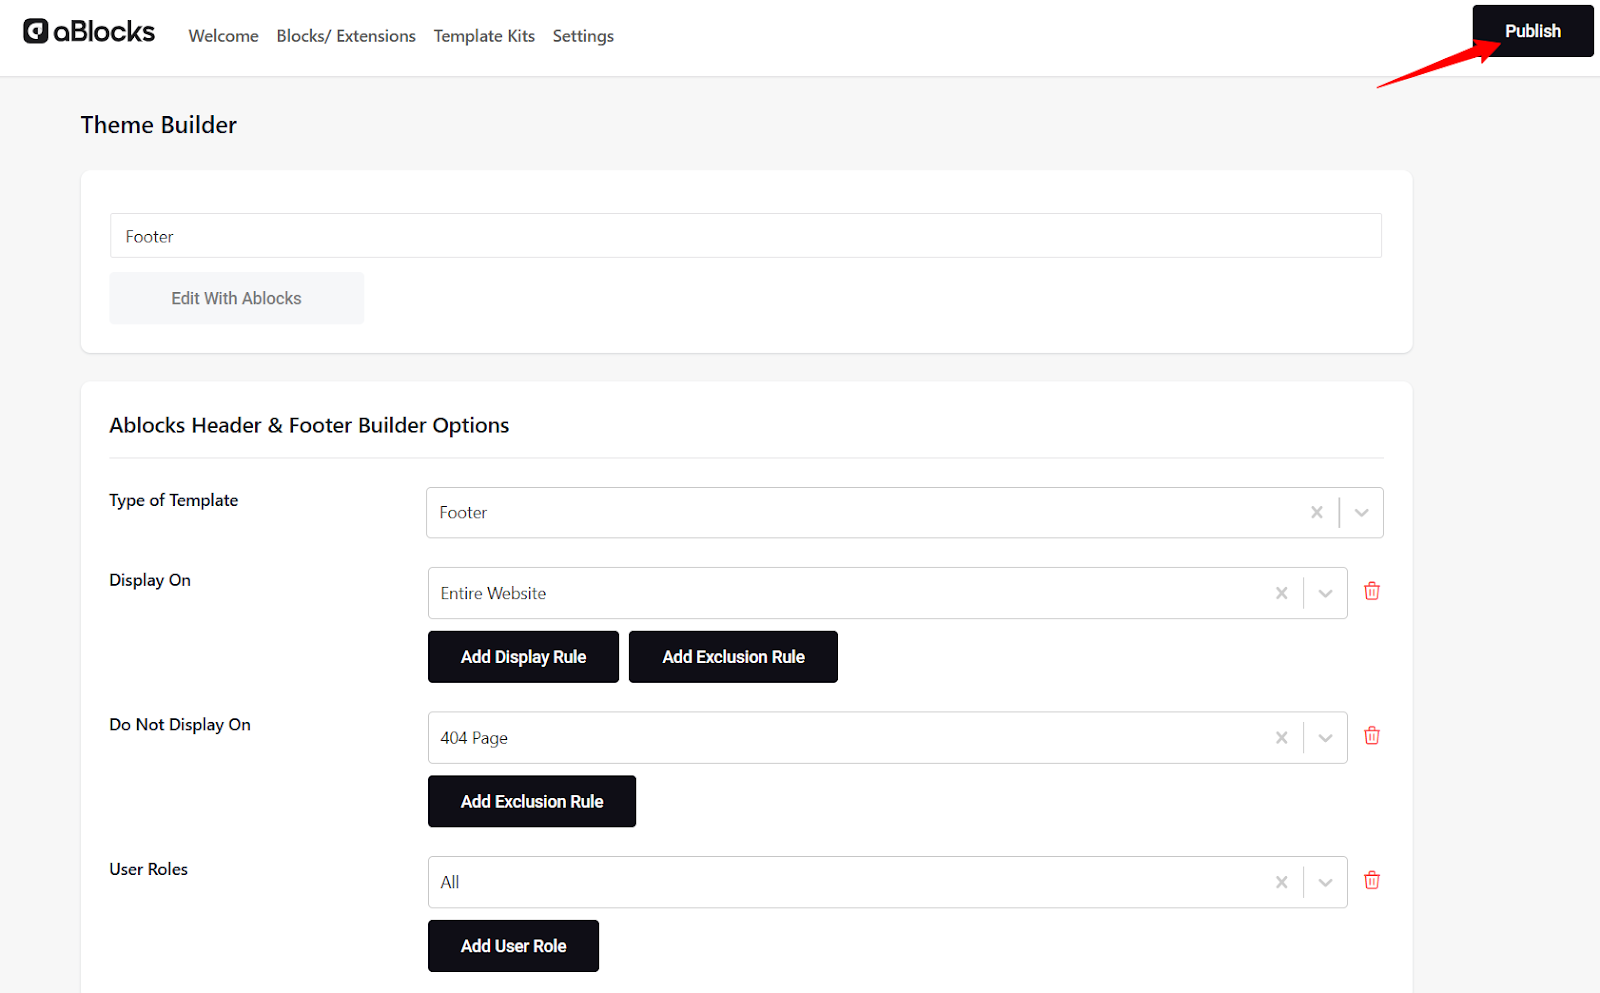
Just like with the header, set your Display Rules to control where this footer will be shown on your site:
- Apply to entire website or specific pages
- Target specific post types, categories, or templates
Step 3: Add Exclusion Rules (Optional)
You can exclude the footer from specific areas of your site using Exclusion Rules:
- Exclude certain pages or conditions
- Add multiple exclusions as needed
Step 4: Assign User Role Visibility
Control which visitors see the footer by assigning visibility by user roles—for example, showing different footers for guests and logged-in users.
Step 5: Publish the Footer
Once all conditions and rules are set, click “Publish” to activate your footer template.
Customize the Footer with aBlocks
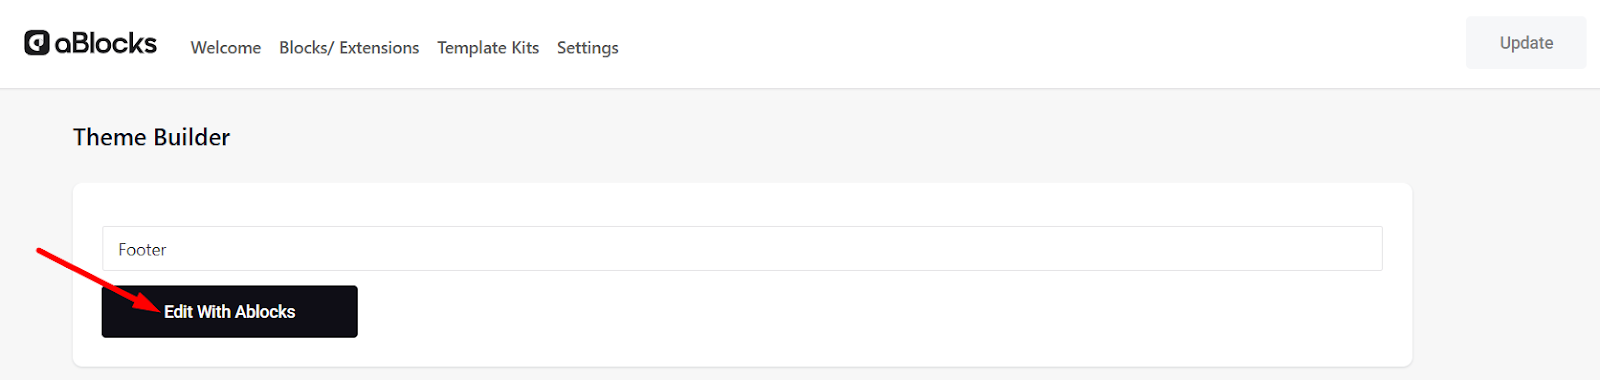
After publishing, click the “Edit with aBlocks” button to launch the visual editor.
In the editor:
- Click the ➕ Plus icon to add blocks
- Search and insert blocks like:
- Navigation Menu
- Text, Image, Buttons
- Social Icons
- Newsletter Signup, Contact Info, etc.
Use Columns, Grid, or Section blocks to organize your footer layout responsively. You can mix design elements freely to create a footer that supports your site goals—such as trust signals, navigation, or conversion.
Tip: Make sure your footer is mobile-friendly and contains essential links like privacy policy, terms, and contact.
Adding a Footer Before Section
By following the same steps outlined in the sections above, you can easily create your Footer Before section using the aBlocks Theme Builder. Simply set the template type to Footer Before, configure your display and exclusion rules, assign user role visibility, publish the template, and then customize it using the aBlocks editor to match your design needs.
Creating and Using Custom Blocks
Discover how to build reusable block layouts and place them across your site.
Creating a Custom Block in aBlocks Theme Builder is a smart way to streamline design workflows and maintain consistent branding throughout your website.
To get started, navigate to the Theme Builder menu and click Add New. Give your block a clear, descriptive title, select Custom Block as the template type, and click Publish. After publishing, a unique shortcode will be automatically generated—copy this for use in your site content.
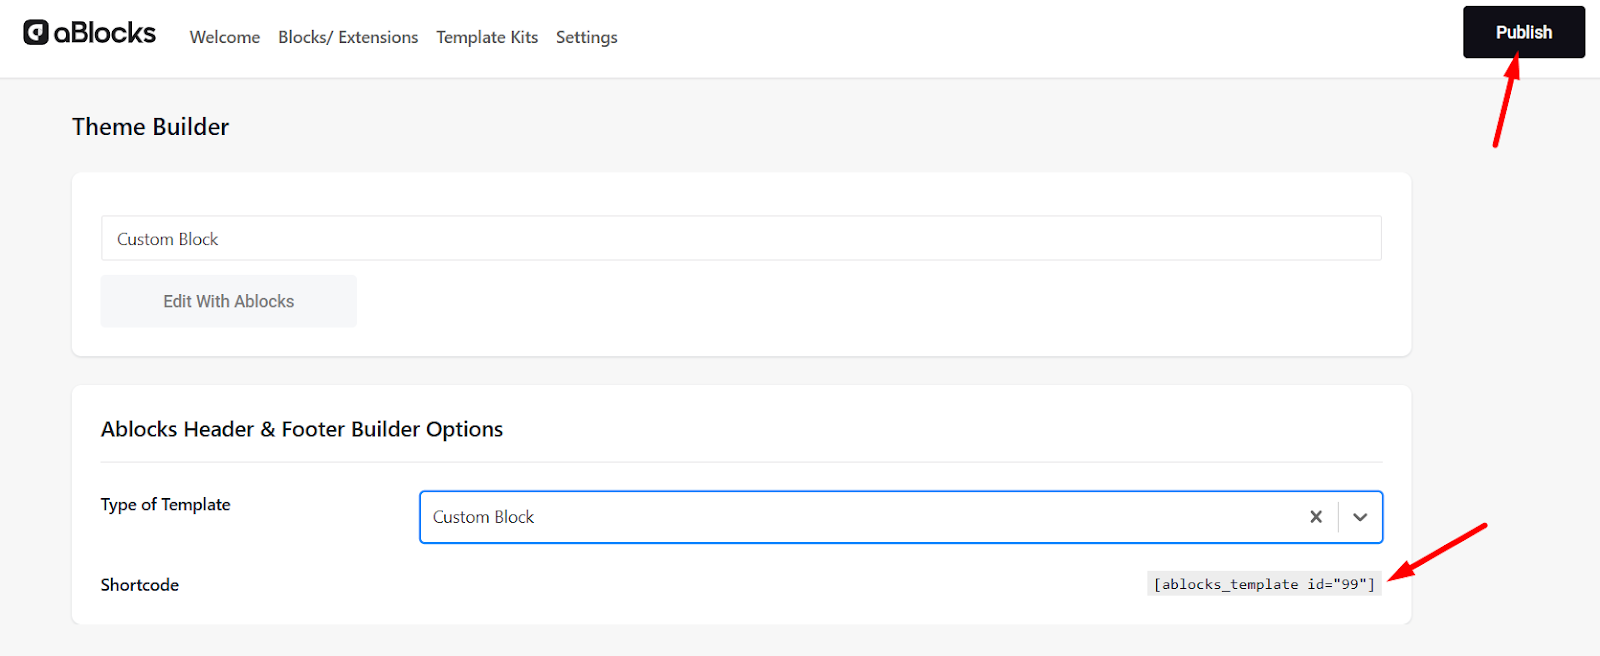
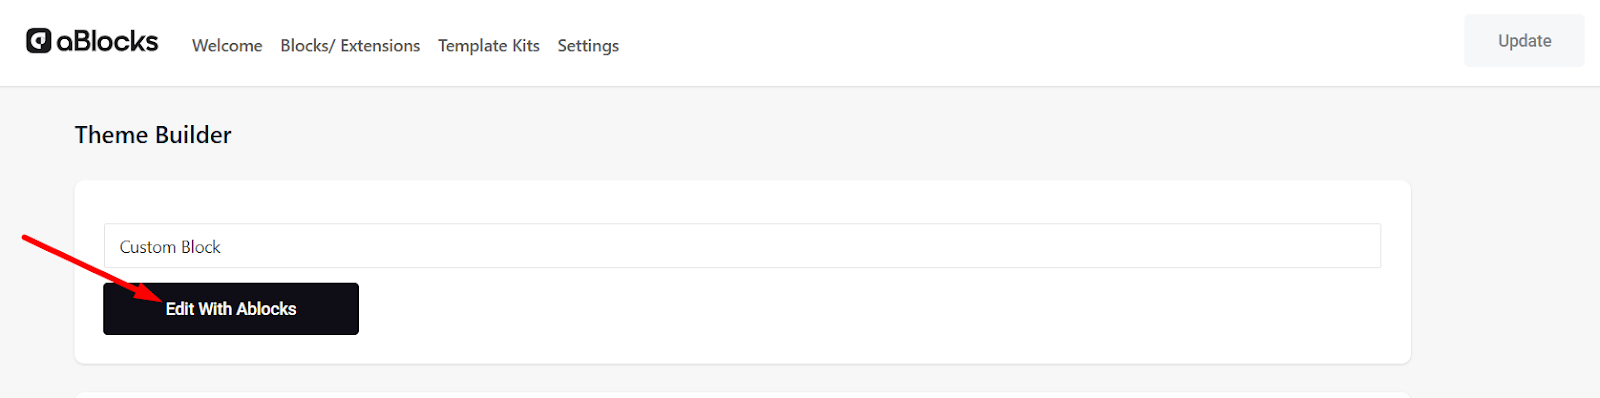
Next, click Edit with aBlocks to open the visual editor.
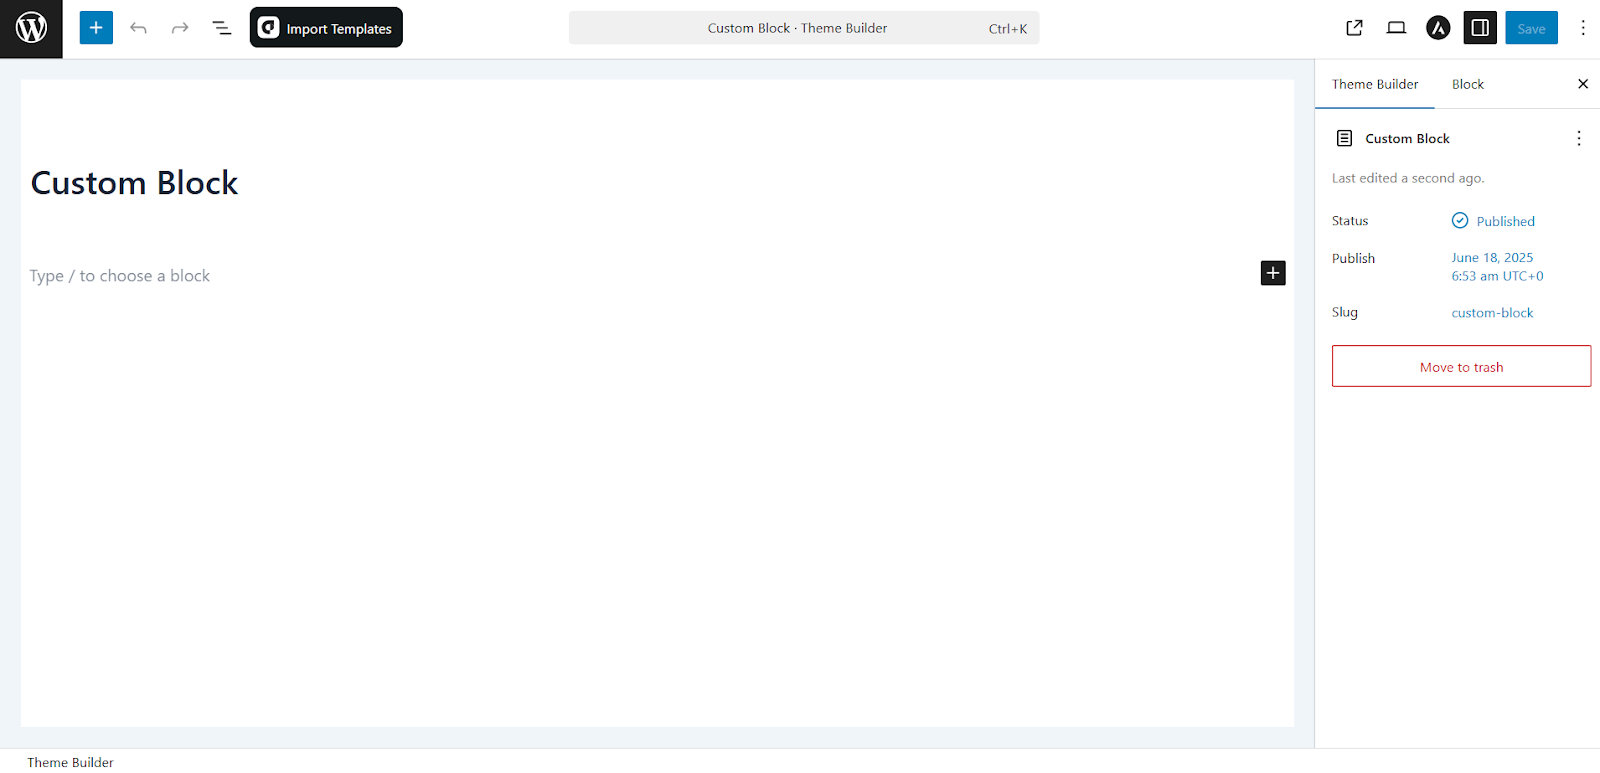
Here, you can design any layout or content element you want—from feature sections and promotional banners to testimonials or styled callouts. Once your design is complete, you’re ready to reuse it anywhere on your site.
To insert your custom block on a page, simply add a Shortcode block and paste the shortcode you copied earlier. The block will render exactly as designed, saving you the time and effort of recreating sections manually. Best of all, you can reuse the same custom block across multiple pages, ensuring consistent design and faster page-building at scale.
Pro Tip: When updating a custom block, your changes automatically reflect wherever the shortcode is used—making site-wide updates seamless and efficient.
aBlocks Design Integrates With Other Page Builders
Use your aBlocks designs seamlessly across popular WordPress page builders.
While aBlocks is built to work natively with the WordPress block (Gutenberg) editor, its flexibility doesn’t stop there. Thanks to the shortcode functionality in Custom Block templates, you can easily integrate aBlocks-designed layouts into other popular page builders like Elementor, Beaver Builder, Divi, and more.
Once you’ve created and published a Custom Block in aBlocks, a unique shortcode is generated automatically. You can copy this shortcode and paste it into any shortcode-compatible widget, module, or section within your preferred page builder.
This allows you to:
- Design sections with aBlocks’ visual editor
- Reuse those designs inside Elementor or other builders
- Maintain design consistency across platforms
- Leverage aBlocks’ performance-optimized blocks even outside Gutenberg
💡 Tip: This integration is ideal for teams migrating from page builders or mixing design workflows. aBlocks helps unify visual consistency while supporting legacy tools.
Whether you’re all-in on Gutenberg or still using a hybrid setup, aBlocks ensures your designs stay reusable, adaptable, and scalable across your entire WordPress ecosystem.
Note: If you experience any styling or loading issues when using aBlocks designs inside other page builders, you can disable the aBlocks Asset Generation feature.

Navigate to aBlocks → Settings → Asset Generation and toggle off “Enable Asset Generation”. This allows the external page builder to take full control over styling while still displaying your aBlocks layout correctly via shortcode.