


The aBlocks PayPal Button Block allows you to easily integrate PayPal payment functionality into your WordPress site. This block provides a simple yet powerful way to accept payments, making online transactions more convenient for both you and your customers. You can tailor the aBlocks PayPal button to match your website’s design and business requirements with various customization options—including button styles, icons, pricing settings, and advanced configurations.
Add PayPal Button
First, open your WordPress dashboard and click the edit page or post. Then navigate to the section where you want to add the counter.
Click the plus (+) icon to add a new block.
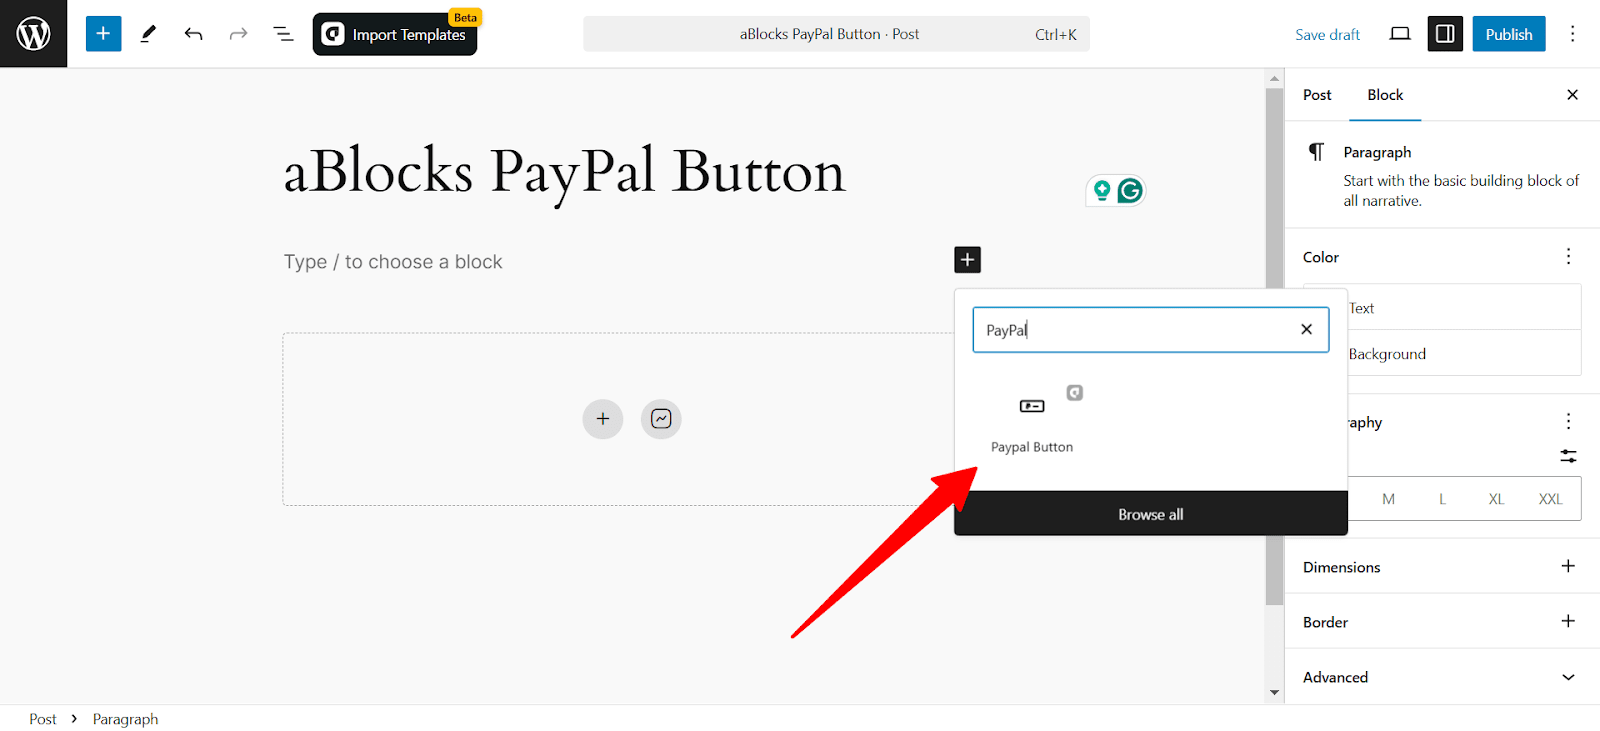
Afterward, find the “PayPal Button” from the search option. Simply just click on the aBlocks PayPal button block.
To customize it, select the PayPal button and go to the right-side panel Block>General and explore the vast library of aBlocks PayPal button block customization options.
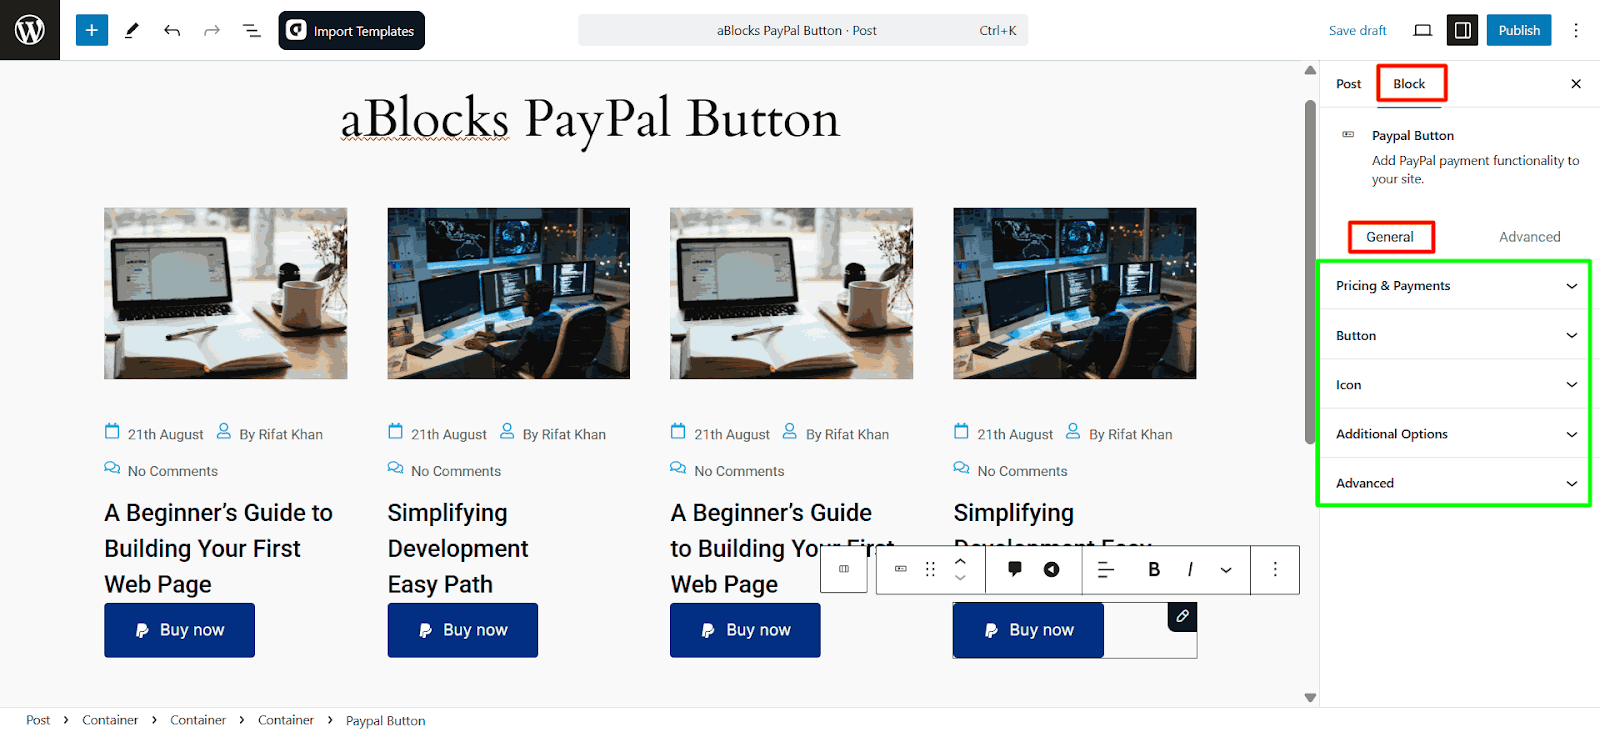
Let’s describe the customization options one by one.
PayPal Button Customization
PayPal Button Customization lets users personalize payment buttons by adjusting styles, sizes, colors, and functionality to match their website and business needs. This enhances the payment experience for customers.
Pricing & Payments
Set the product price and currency for PayPal transactions. You can also enable quantity selection and recurring payments.
- PayPal Account: Enter your PayPal email to receive payments.
- Transaction Type: Select your transaction type. You can select Checkout, Donations, or Subscription.
- Item Name: Select your item name.
- Price: Set the price.
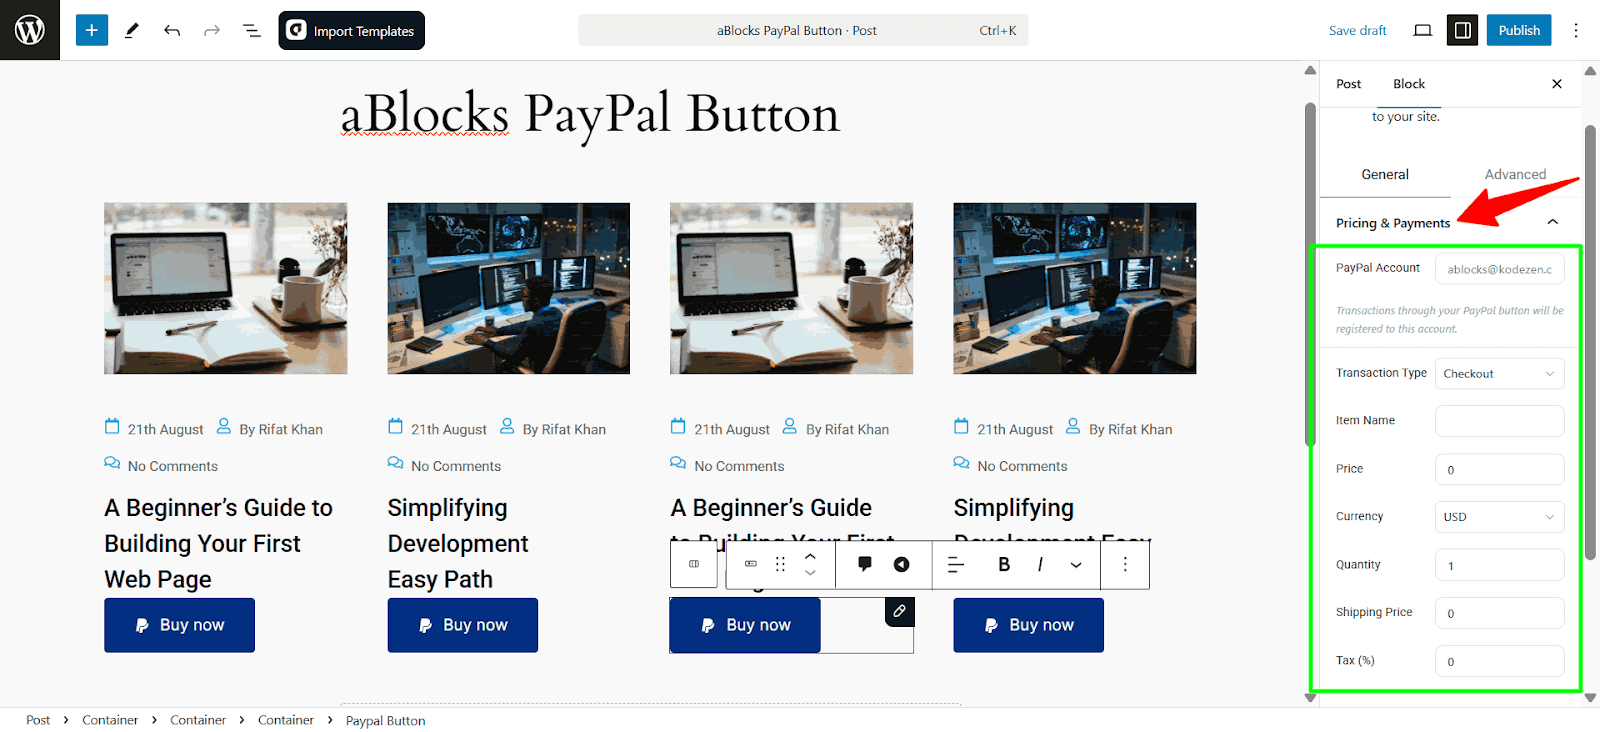
- Currency: Set your preferred currency for your money.
- Quantity: Set the quantity.
- Shipping Price: Set the shipping price.
- Tax (%): Set the tax in %.
Button Settings
The Button section allows you to configure the PayPal button’s appearance, behavior, and style on your site. You can customize its content, position, and display options to match your design.
Button Content Settings
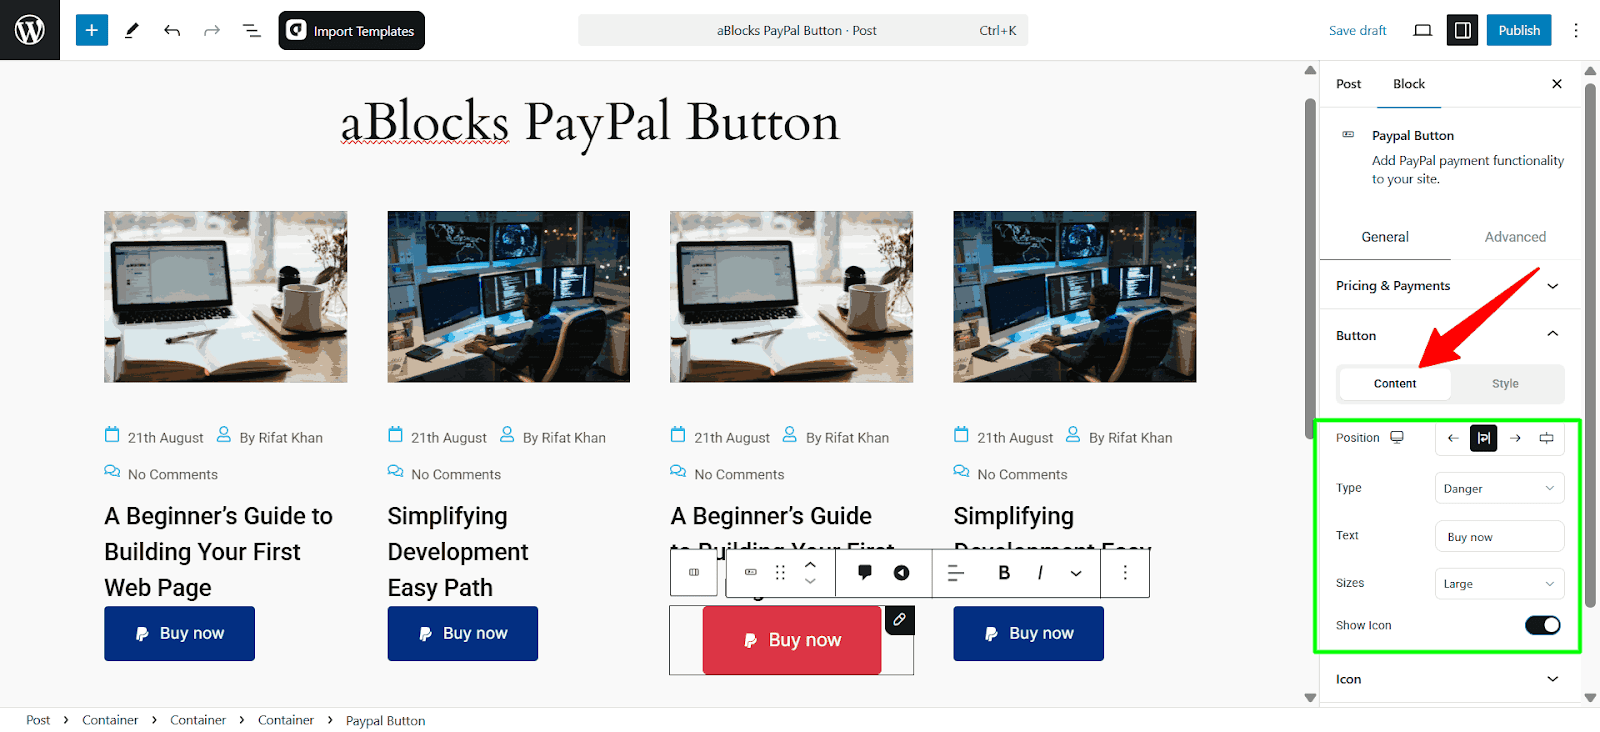
- Position – Choose where the button appears within its container (left, center, right, and stretch).
- Type – Select the button style from the available options.
- Text – Modify the button text to suit your needs.
- Size – Adjust the button size (extra small, small, medium, large, or extra large).
- Show Icon – Toggle the PayPal icon on or off.
Style
- Typography – Modify the text font, size, weight, style, and others. To learn more, read our aBlocks typography settings.
- Text Shadow – Apply a shadow effect to the button text.
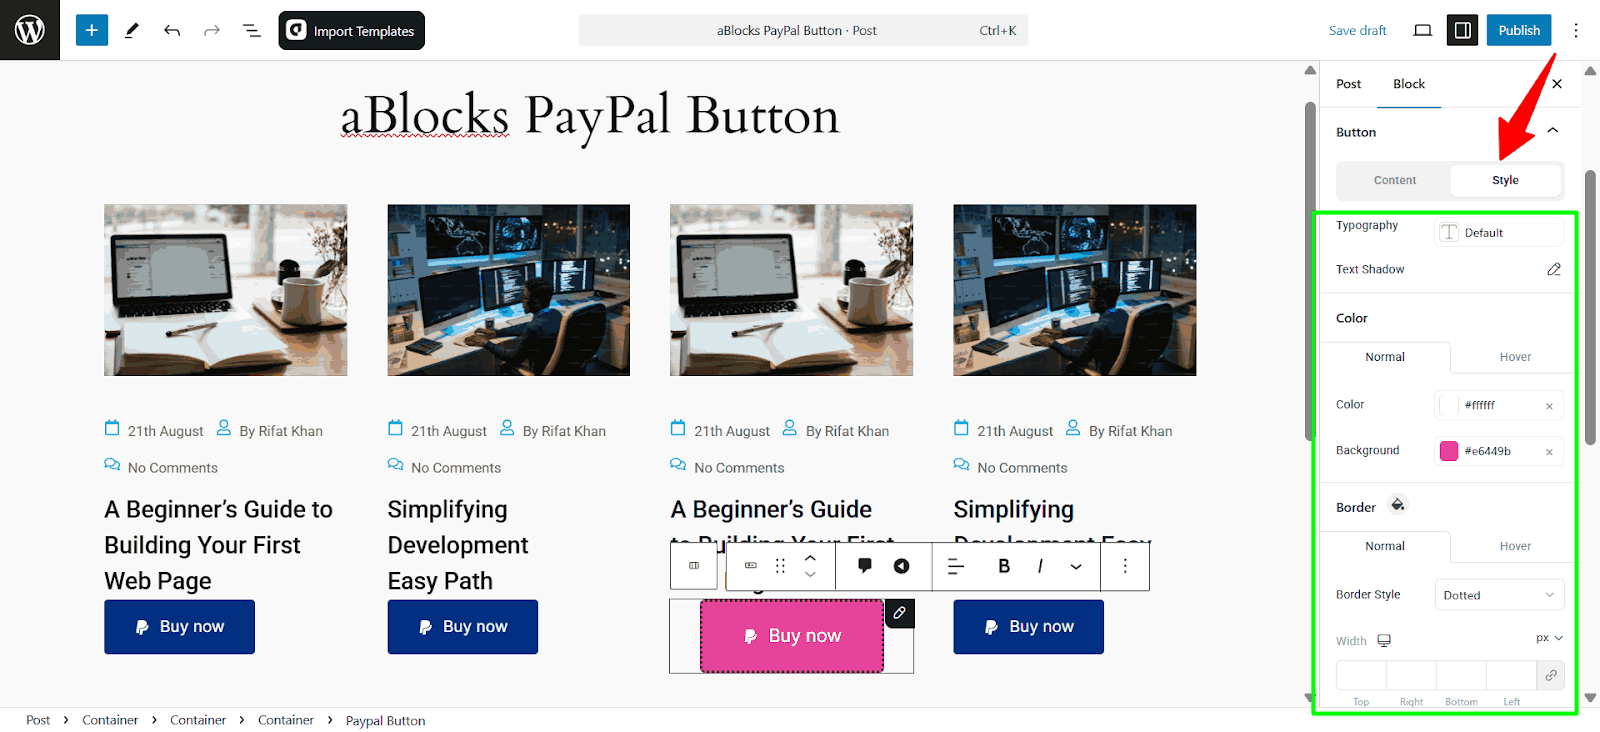
Button Color
- Normal – Set the text and background colors for the default state.
- Hover – Customize the text and background colors when hovered.
Button Border
- Style – Choose from solid, dashed, or dotted borders and many others.
- Width – Define the border thickness.
- Border Color – Select a custom color for the border.
- Border Radius – Adjust the rounded corners for a softer look.
- Padding – Define space inside the button for better spacing and readability.

Box Shadow
- Box Shadow – Apply a shadow effect for a more distinct look.
- Transition Duration – Set how quickly the button changes its appearance when hovered or clicked.
Icon
The Icon Settings in the aBlocks PayPal Button block let you customize the PayPal icon’s appearance and positioning. These settings are divided into Content and Style, allowing for full control over the icon’s design.
Content
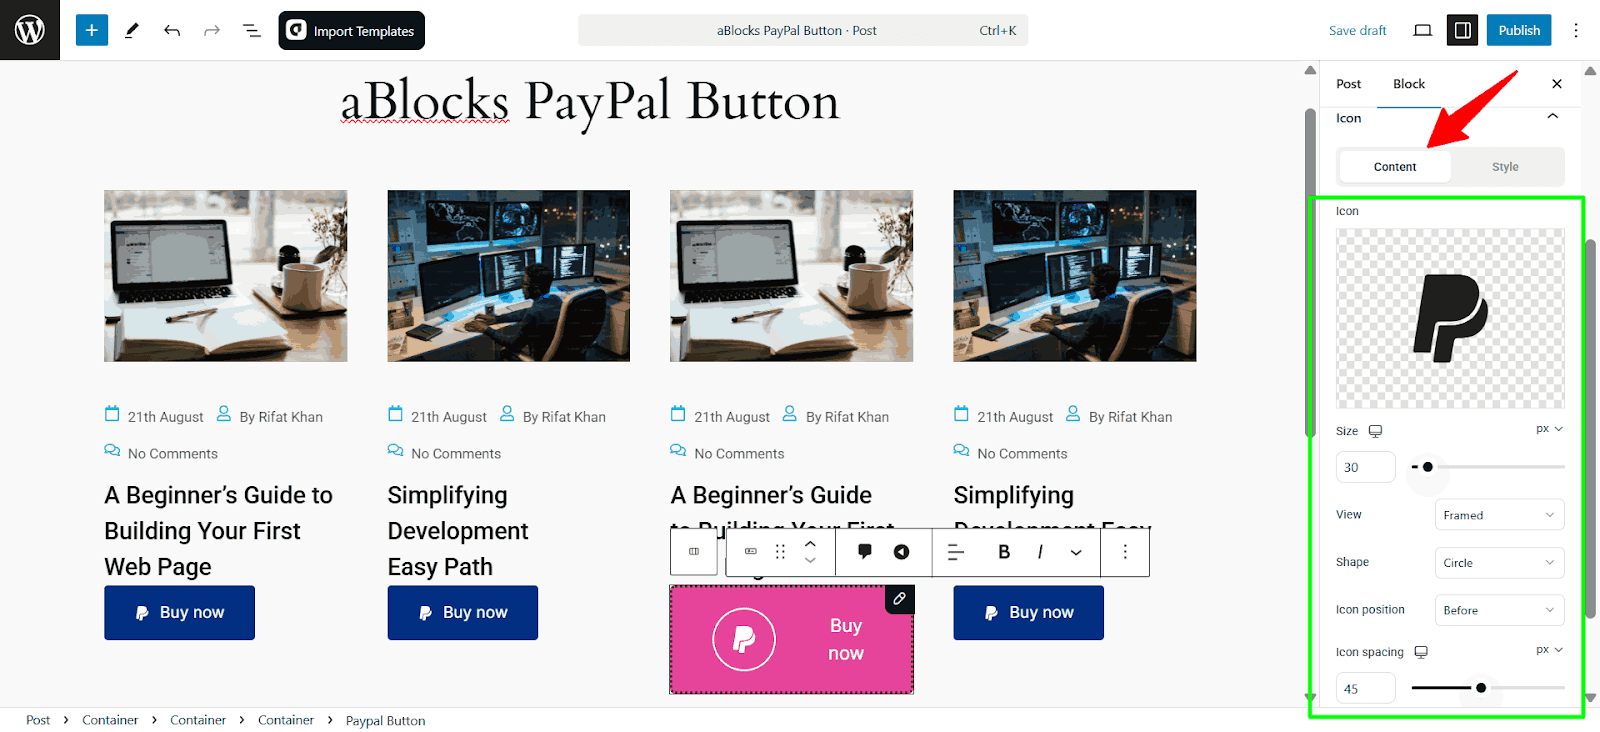
- Icon – Choose the PayPal icon or upload a custom icon.
- Size – Adjust the icon’s dimensions using a slider or input field.
- View – Select how the icon is displayed, such as Framed or Default.
- Shape – Modify the icon’s container shape, such as Circle or Square.
- Icon Position – Define whether the icon appears Before or After the text.
- Icon Spacing – Set the distance between the icon and the button text for better alignment.
Style
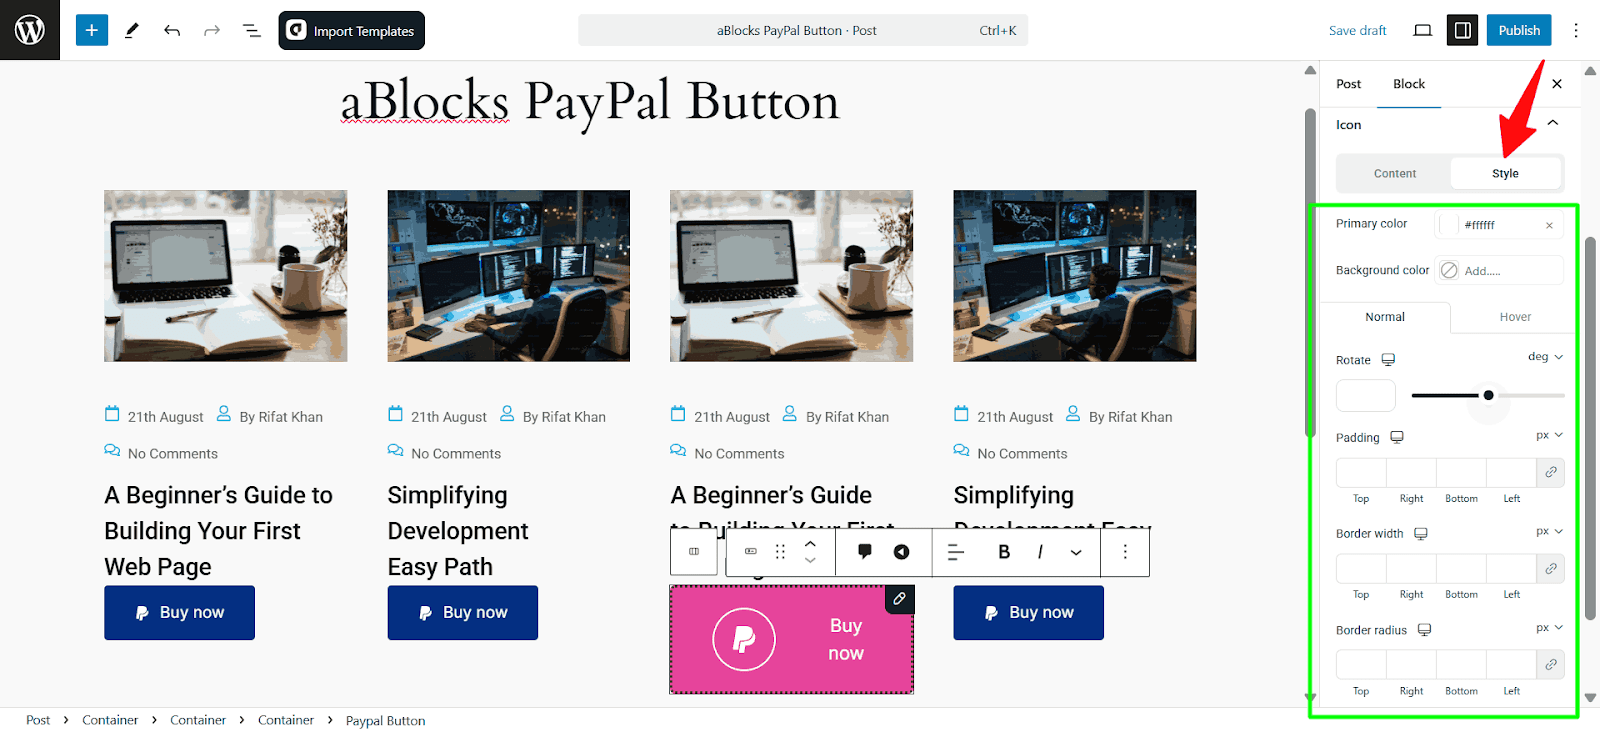
- Primary Color – Change the icon color.
- Background Color – Set a background color for the icon.
- State (Normal/Hover) – Customize the icon’s appearance for both normal and hover states.
- Rotate – Rotate the icon by setting a degree value.
- Padding – Adjust padding around the icon for better spacing.
- Border Width – Define border thickness for each side individually.
- Border Radius – Round the icon’s corners to achieve a softer look.
Advanced Options
The Advanced Options section provides additional customization settings for your PayPal button, allowing you to enhance the payment experience. These options help manage redirection, sandbox testing, and user interaction after payment.
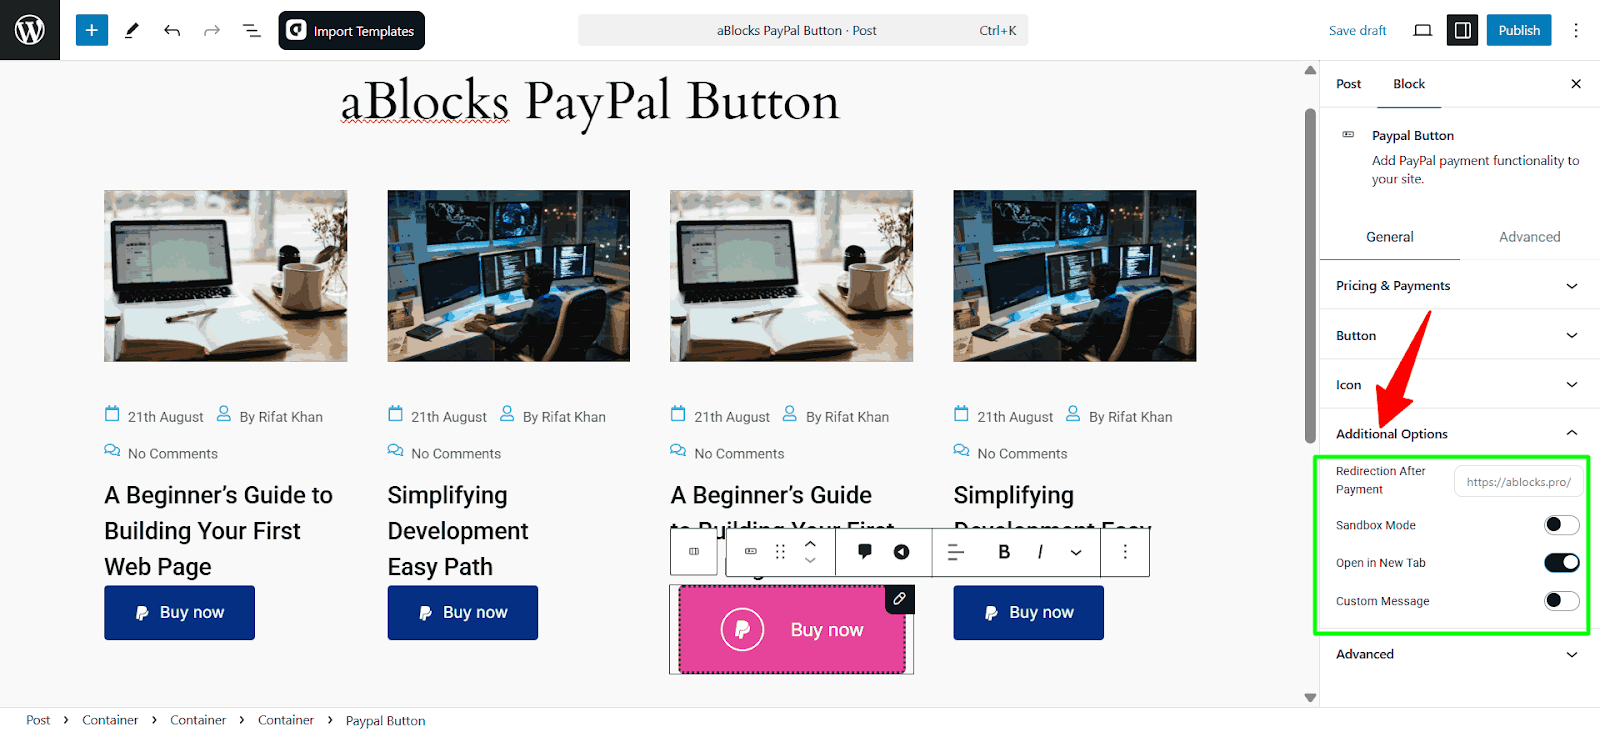
Redirection After Payment – Set a URL where users will be redirected after completing a payment.
Sandbox Mode – Enable this option to test transactions without processing real payments.
Open in New Tab – Choose whether the payment page opens in a new browser tab.
Custom Message – Set a customized error message here.
Conclusion
The aBlocks PayPal Button Block in WordPress provides a seamless way to integrate PayPal payments into your site. With its customization options—including button styling, icons, redirection settings, and advanced configurations—you can tailor the user experience to match your brand and business needs. By leveraging these features, you ensure a smooth, secure, and user-friendly checkout process for your customers.