


The aBlocks Frontend Dashboard lets you create dynamic, user-friendly dashboards directly on the frontend of your WordPress website. With customizable routes, flexible layouts, and support for dynamic content, you can build dashboards for customers, members, students, clients, or any user role—without coding.
This guide covers the full setup, routing structure, design options, and dynamic data integration.
1. Requirements
Before starting, make sure:
- aBlocks is installed and activated on your WordPress site.
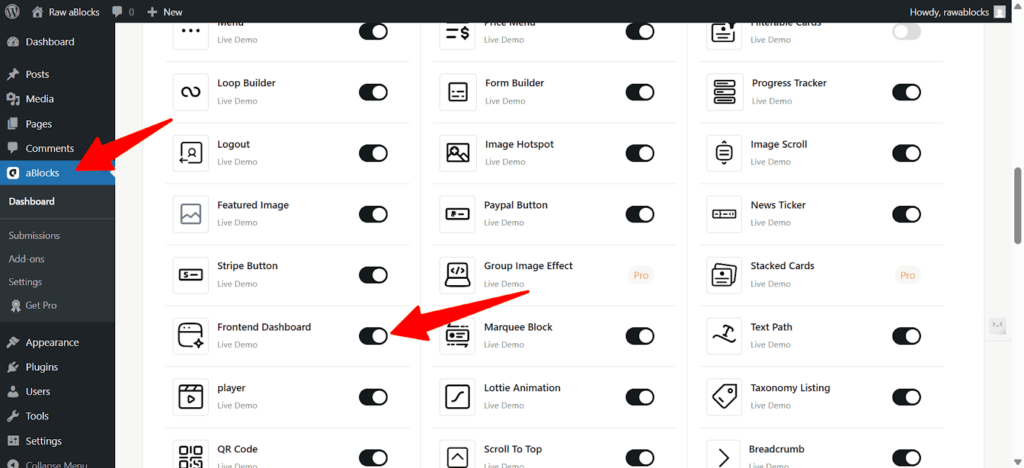
- The Frontend Dashboard blocks are enabled from
Dashboard → aBlocks → Blocks/ Extensions → Frontend Dashboard.
2. Create the Dashboard Page
- Go to Pages → Add New.
- Give your dashboard page a title.
- Insert a Container block to hold your dashboard content.
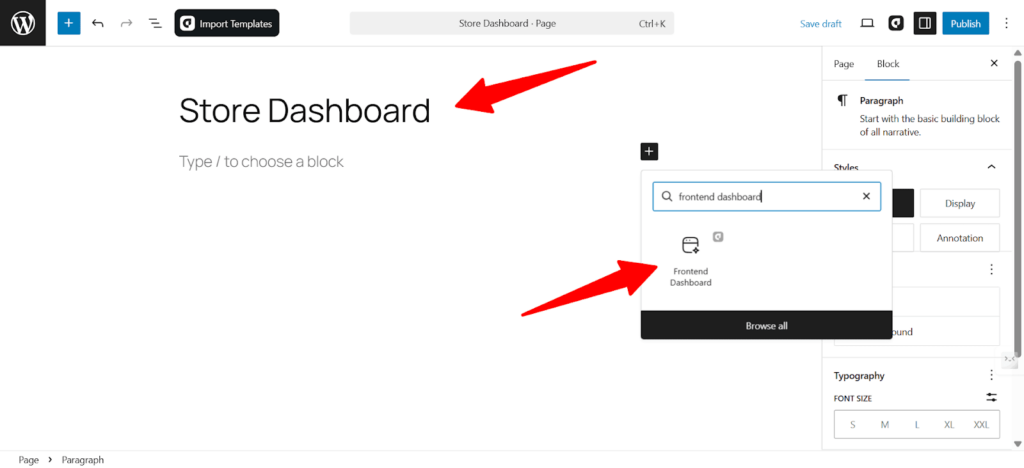
- Search for “Frontend Dashboard” in the block inserter and add it.
- Publish the page.
(The dashboard block will appear blank until routes are configured.)
3. Configure the Dashboard Routes
Routes control the sidebar menu and interior pages of your dashboard.
- Go to Dashboard → aBlocks → Settings → Frontend Dashboard.
- Under the Frontend Dashboard, select the page you created.
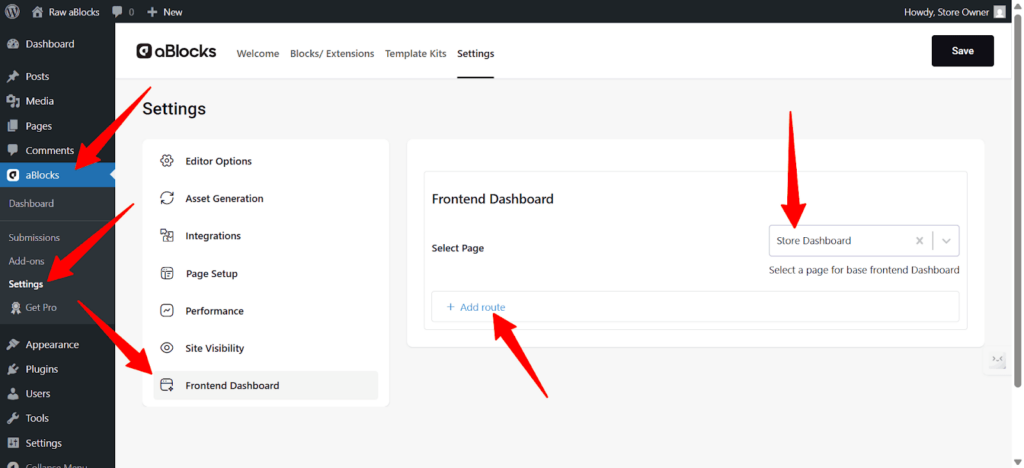
- Click Add Route to create your first section.
Each route includes:
- Type – Choose how the route behaves when clicked in the dashboard menu.
Page: Creates a new internal page inside the dashboard. This page can hold dynamic or static content.
Link: Use this when you want the menu to open an external URL or link to another existing page outside the dashboard.
- Label – Enter the menu name for this route.
- Slug – Define the URL for the route.
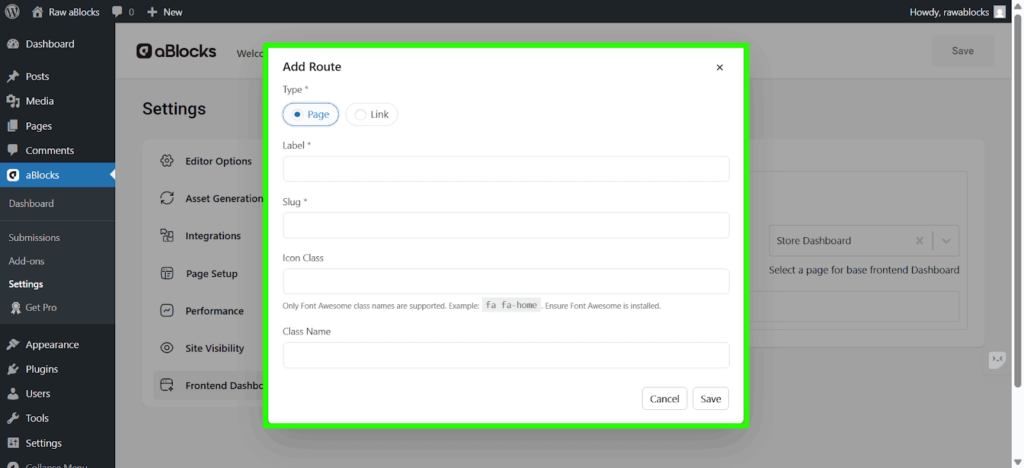
- Icon Class – Add a Font Awesome icon class to display an icon next to the route label
- Class Name– Add a custom CSS class for advanced styling
After saving:
- You will see the default Root route and your newly added route.
- aBlocks automatically creates a page for every route you add.
Add More Routes
- Create additional sections as needed.
- Add sub-routes the same way.
- Drag routes to reorder the sidebar menu.
- Labels, slugs, and icons can be edited anytime.
4. Add Content to Each Route
Each route contains its own content area.
- Click Add Content for a route.
- Build your layout using any blocks:
- Containers
- Headings
- Text
- Images
- Buttons
- Dynamic data blocks
- Shortcodes
- Design freely—every aBlocks styling feature is available. Save your content after designing.
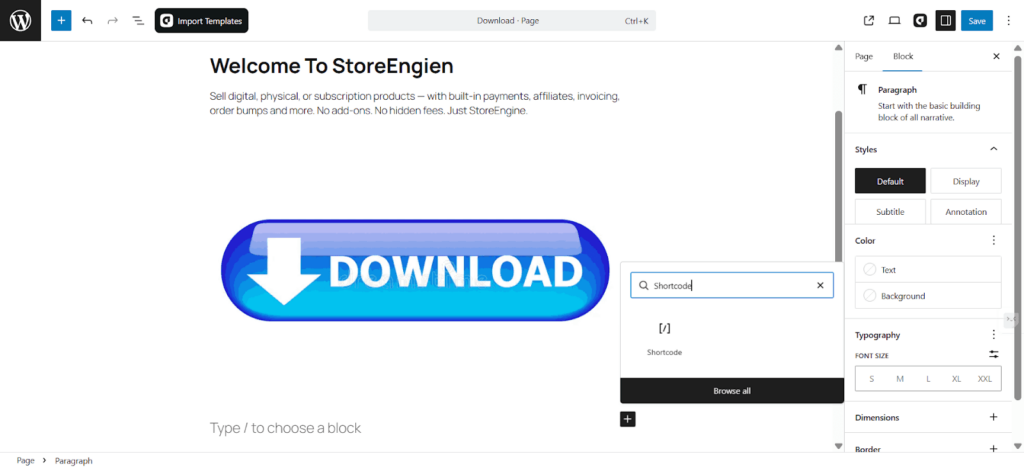
5. Add Dynamic Data Using Shortcodes (WooCommerce Example)
To display WooCommerce information, ensure WooCommerce is installed.
Display Products
- Go to WooCommerce Documentation → Shortcodes.
- Copy the product shortcode you prefer.
- Return to your dashboard route.
- Add a Shortcode block and paste it.
- Save and preview the page.
Products will now load dynamically.
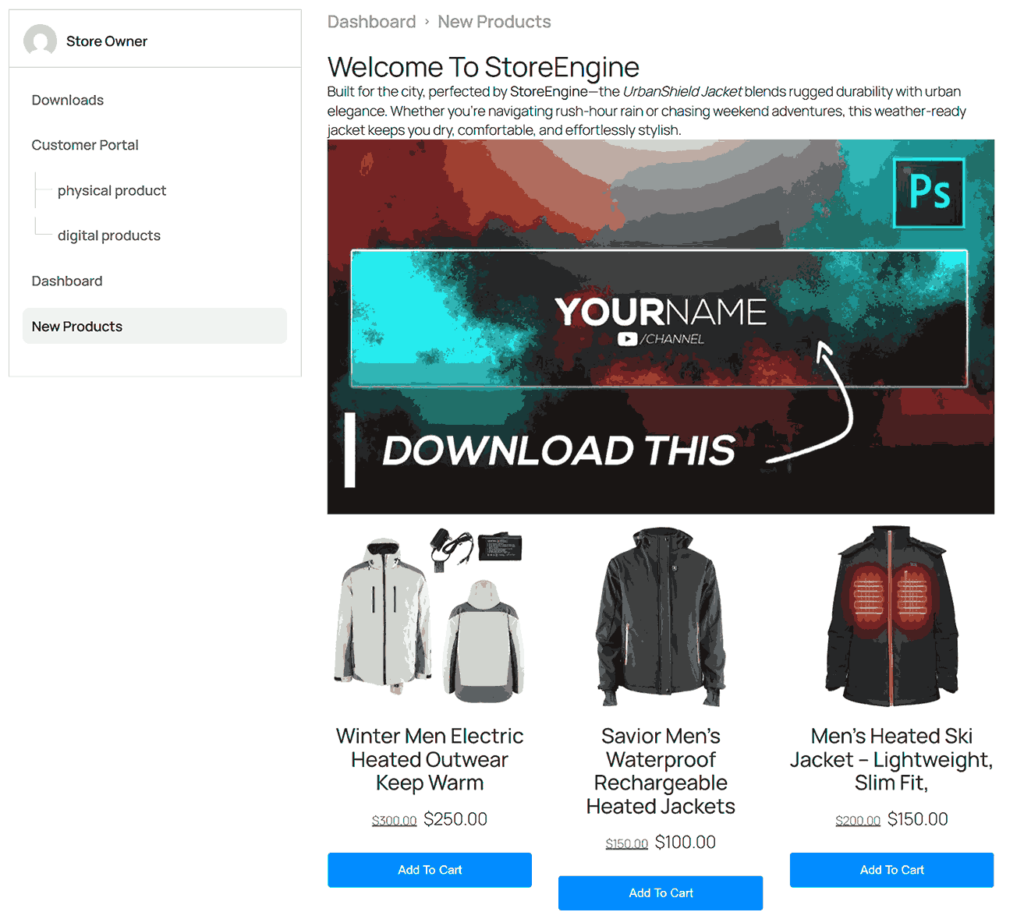
Add Cart Shortcode
- Add a new route labeled from aBlocks settings.
- Add a container inside that route’s content.
- Insert a Shortcode block.
- Paste the WooCommerce Cart shortcode.
- Save and preview.
Your users can now track orders directly from the dashboard.
Design & Customize the Dashboard
After creating your routes and adding content, you can fully customize the look and feel of your Frontend Dashboard.
To customize the Frontend Dashboard, return to the page where you added the Frontend Dashboard block and select the block. This will open all design settings in the right sidebar.
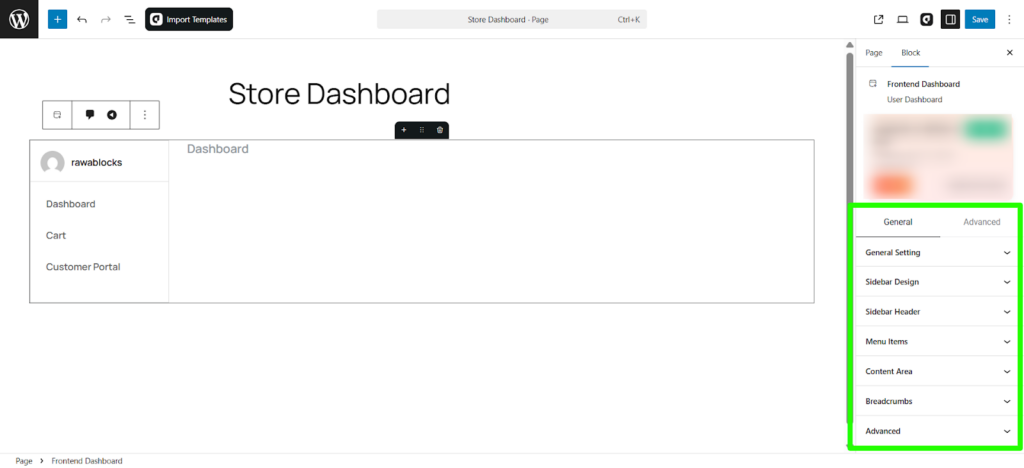
You will see the following sections:
- General Setting
- Sidebar Design
- Sidebar Header
- Menu Items
- Content Area
- Breadcrumbs
- Advanced
Each section includes multiple styling controls (color, spacing, typography, hover styles, and more) that let you fine-tune both the sidebar and the dashboard content area. These options allow you to adjust the full layout and appearance of your dashboard with complete flexibility.
Conclusion
The aBlocks Frontend Dashboard allows you to build professional, dynamic dashboards—without coding and fully from Gutenberg. With support for custom routes, WooCommerce data or any others eCommerce plugin data, shortcodes, and flexible layout controls, you have complete control to design dashboards for any type of user.
You can now create powerful user experiences with aBlocks. Let your creativity lead the way.